
Onboard to Azure Lighthouse
As discussed in the Lighthouse Overview, Azure Delegated Resource Management projects resources from one Azure AD tenant to another thus giving the partner a cross-tenant experience.
In a nutshell the Lighthouse onboarding process links a partner Azure AD Group to the customer Azure AD Role and customer resource, so it’s important the partner thinks about which permissions their engineers need.
Microsoft have added ARM template samples for Lighthouse to Github, all you have to do is decide whether you want to delegate permissions to a resource group, set of resource groups or a whole subscription then edit the relevant Parameters file with the info below:
mspOfferDescription - The name of the service being offered.
managedByTenantId - Directory ID of the partner tenant.
principleID - Object ID of the Azure AD Group in the partner tenant, the group can even be a dynamic group.
roleDefinitionID - Azure AD role ID in the customer tenant. As always, you should aim to assign the minimum level of permissions to get the job done and there are allot of Azure AD roles available. See here for them all and to also obtain the roleDefinitionID. It’s important to note Azure Lighthouse does not support custom roles.
principalIdDisplayName - The friendly name of the principleID (partner Azure AD Group) that the customer can see.
1. In the example below we’ll onboard a whole subscription so we’ll need to use these files and edit the parameters.json with the info above.
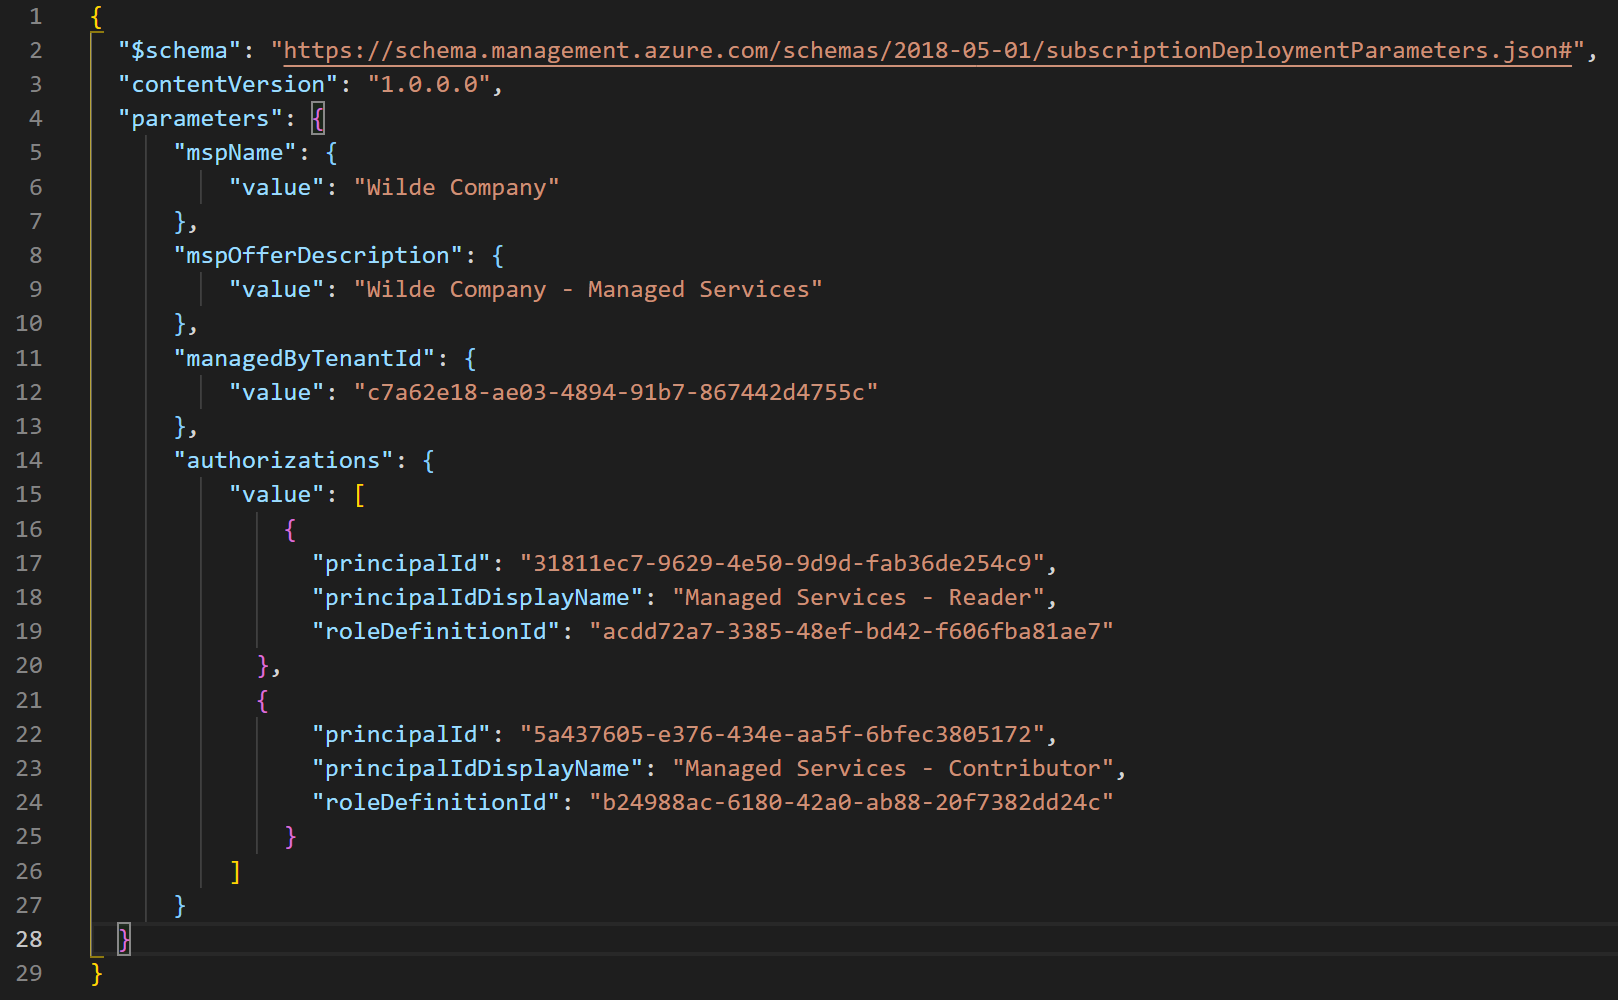 Figure 1: Onboarding Subscription - Parameters file
2. Now we need to deploy the template in the customer tenant on the subscription we want to onboard. Note - This can only be done by an identity that has Owner permissions on the subscription but cannot be done by a guest account.
# Login
az login

# Set the subscription you want to onboard - mine is called Customer Subscription'
az account set -s 'Customer Subscription'

# Run the onboarding templates
az deployment create --name LighthouseOnboarding --location westeurope --template-file delegatedResourceManagement.json --parameters delegatedResourceManagement.parameters.json
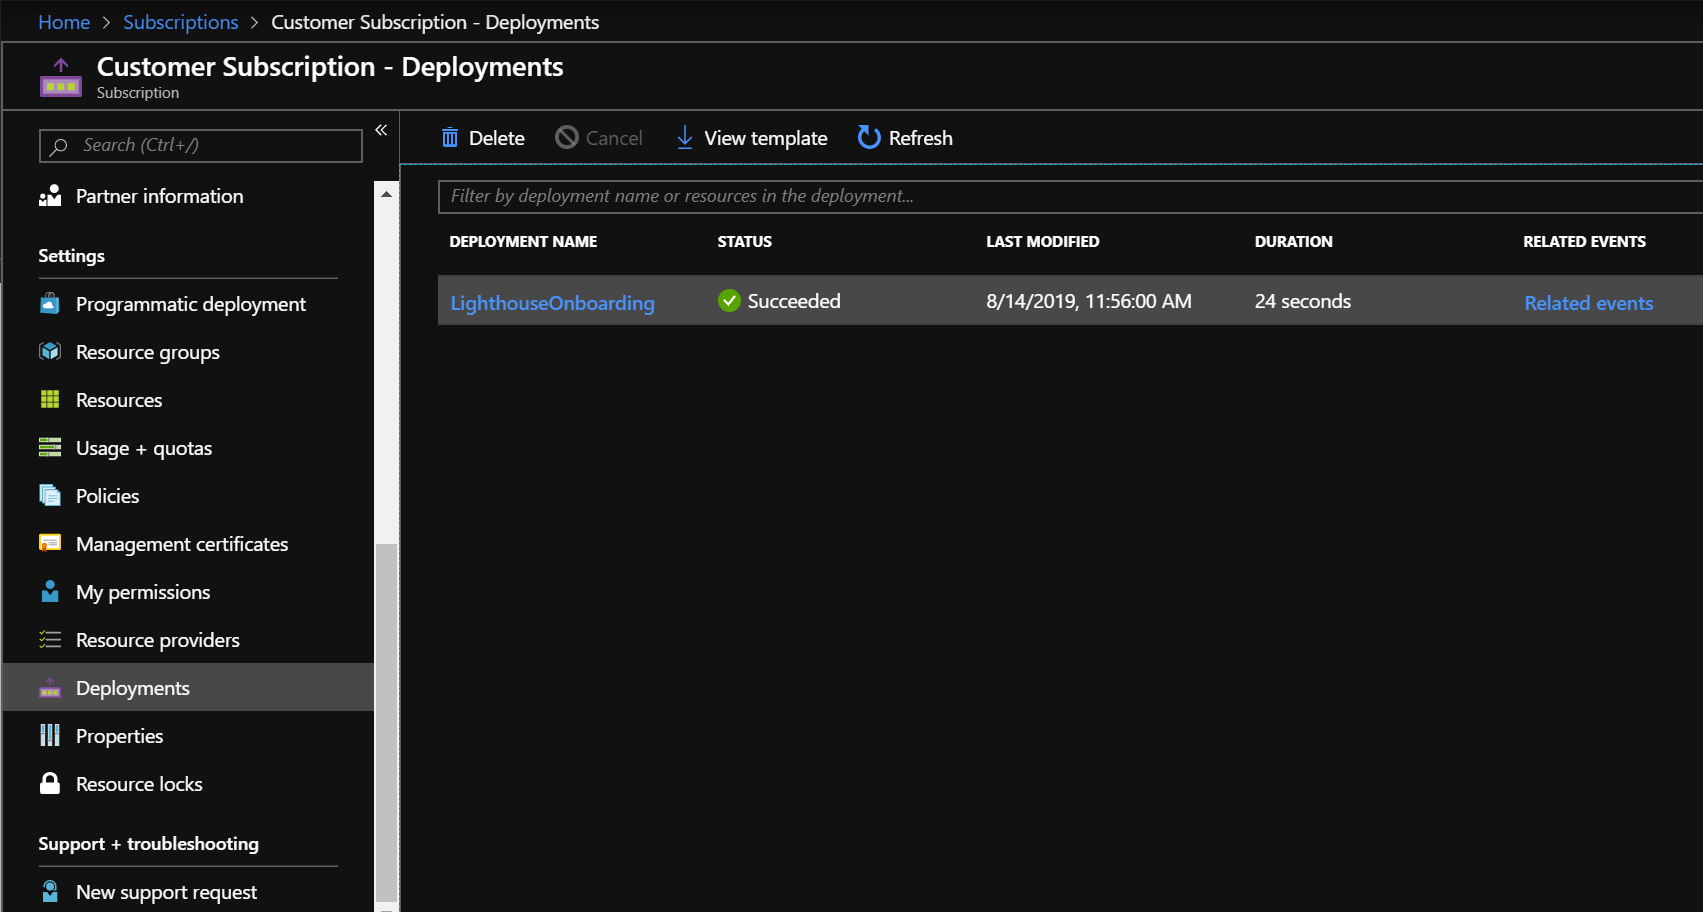 Figure 2: Onboarding Success
3. As the customer in the portal go to All Services > Service Providers. You’ll see the service provider offer and delegation you’ve just deployed.
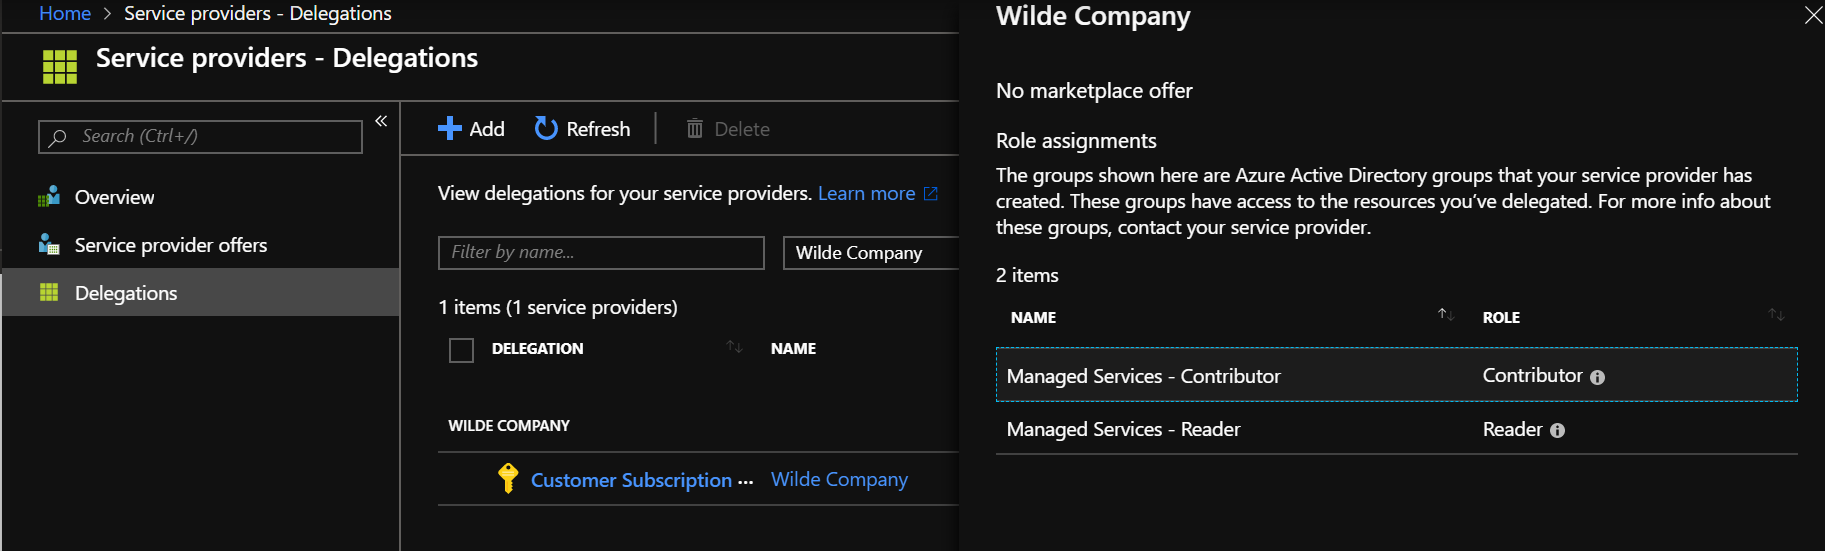 Figure 3: Service Providers - Delegation
4. I’ve also onboarded a single Resource Group from another tenant using this template and parameters file, the only difference is adding the Resource Group name.
Now logged into the Azure Portal as the partner user that’s a member of the groups you just assigned, go to All Services > My Customers. You’ll see the new customers and delegation assigned.
 Figure 4: My Customers
5. As the partner, click on your identity in the top right hand corner > switch directories and notice you can now select multiple directories/tenants and therefor multiple subscriptions.
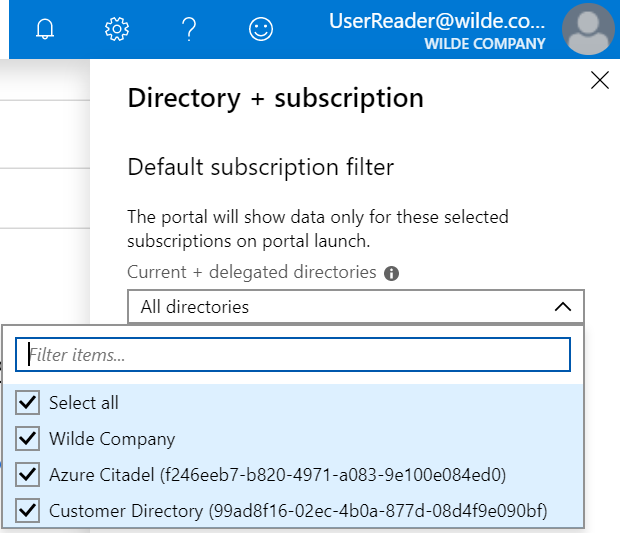 Figure 5: Available Directories
6. Once you’ve selected multiple subscriptions you can work with the resources from the partner tenant using the Azure Portal, Powershell, CLI, etc.
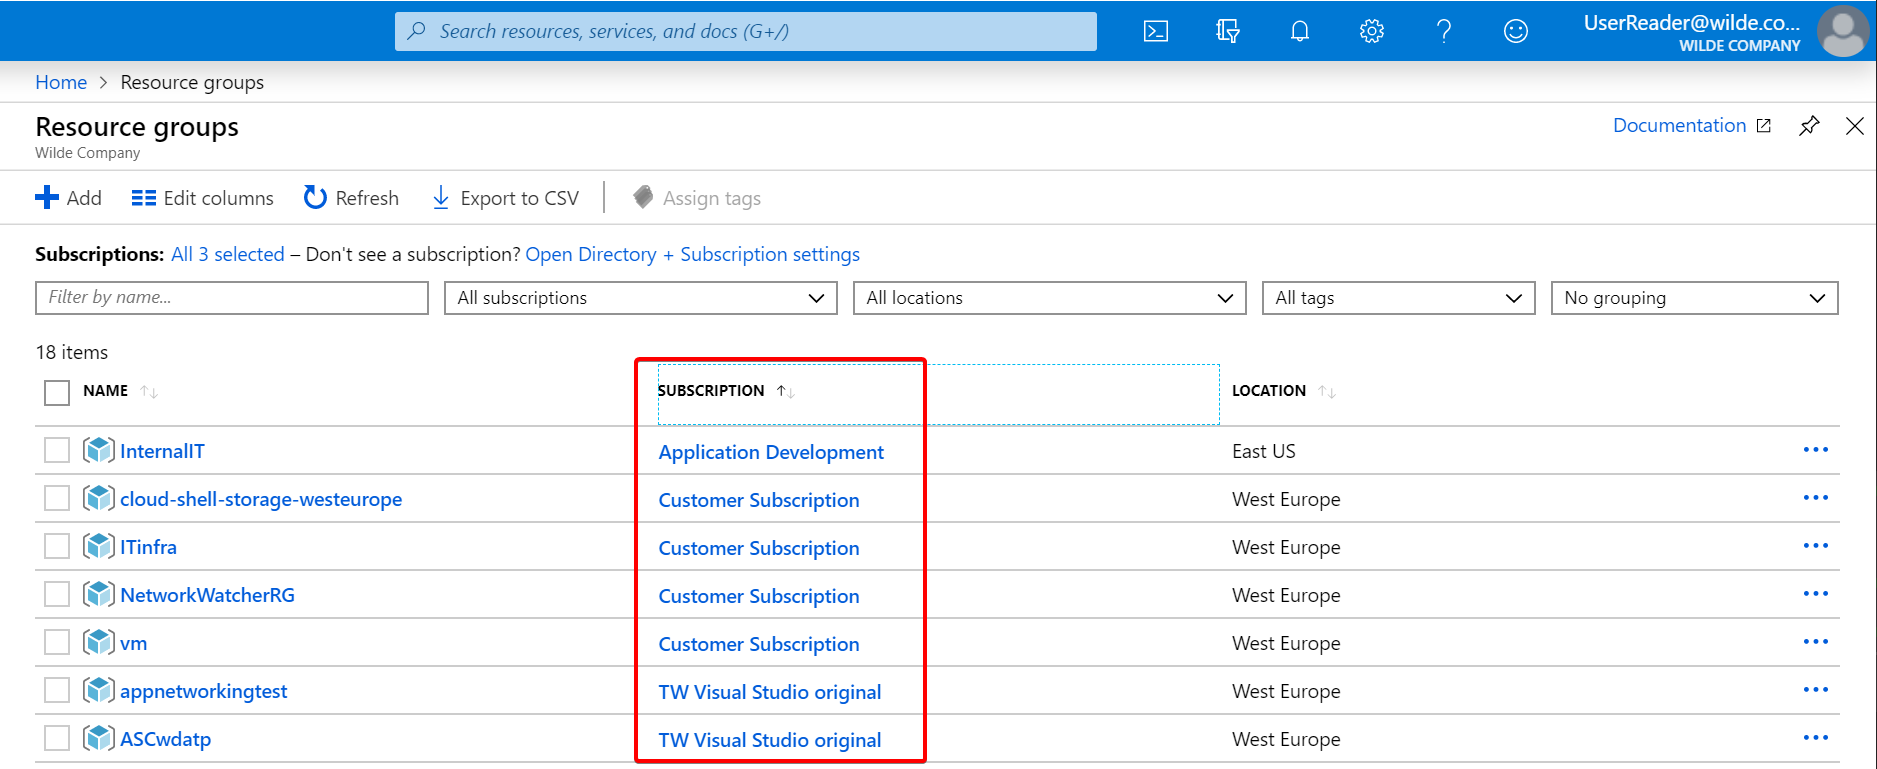 Figure 6: Resources Across Directories
Now you have onboarded customers you can work on the resources almost like they were in your tenant.
Some Azure services also support a cross-tenant view, for example using Azure Security Center to see all the recommendations for all customers or using Azure Kubernetes Service to deploy and manage all your containers.
We’ll explore these in the future, see here for more details.
Leave a comment