
Introduction
Azure Functions is a solution for easily running small pieces of code, or “functions,” in the cloud. You can write just the code you need for the problem at hand, without worrying about a whole application or the infrastructure to run it. Functions can make development even more productive, and you can use your development language of choice, such as C#, F#, Node.js, Java, or PHP. Pay only for the time your code runs and trust Azure to scale as needed. Azure Functions lets you develop serverless applications on Microsoft Azure.
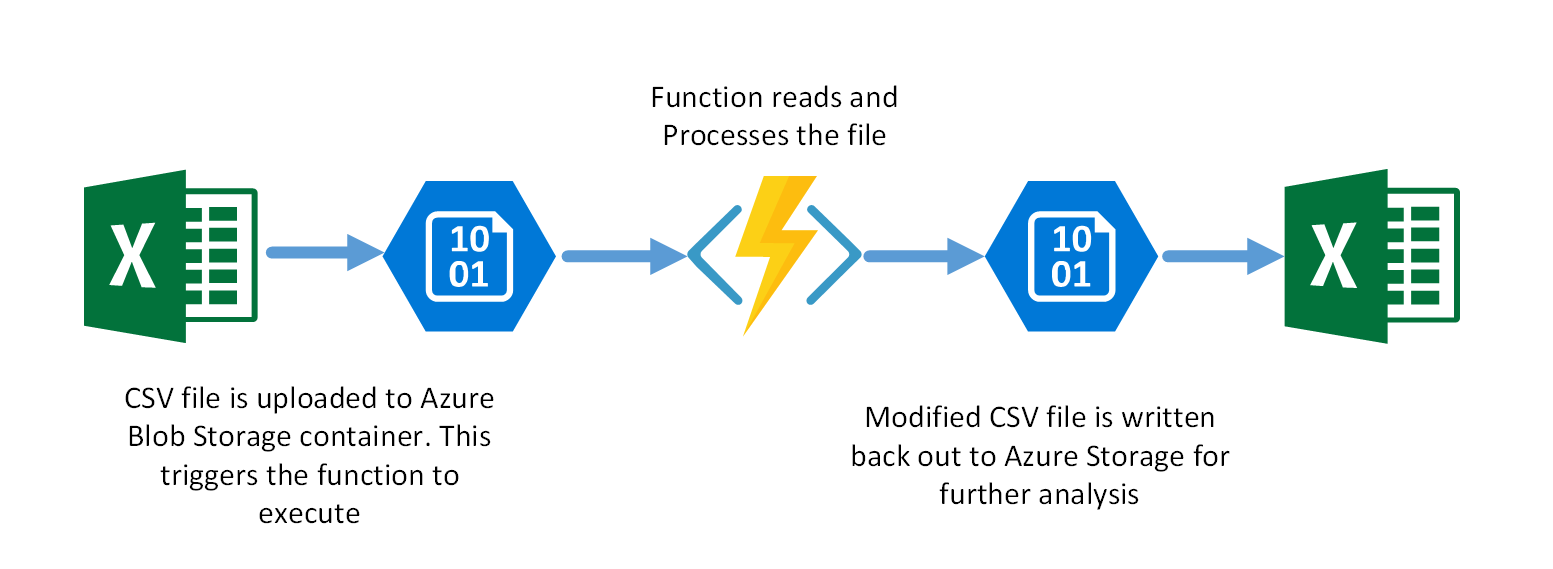
The “problem” we want to solve as the subject of this lab is that we have a csv file containing the details of survivors of the 1914 Titanic Disaster in which the passenger name column is in the format “surname, [title] forename(s) [, suffix]” and we need to reformat it to “title forenames surname suffix” and store the result in a new column for later display. There are also some name entries which do not confirm to this layout and we need to highlight them so that they can be fixed-up. We’ll use a simple function app to do this.
There are many ways to create and deploy a function app, but in this lab we’re going to create a simple C# function app through the Azure Portal. This function will be triggered by the arrival of a new csv file in a defined Azure Storage Container. The function will read the csv file, process it and write-out a new csv file to another blob.
Pre-requisites
- Azure Subscription
- Basic knowledge of C#
Create the function app
- Login to the Azure Portal
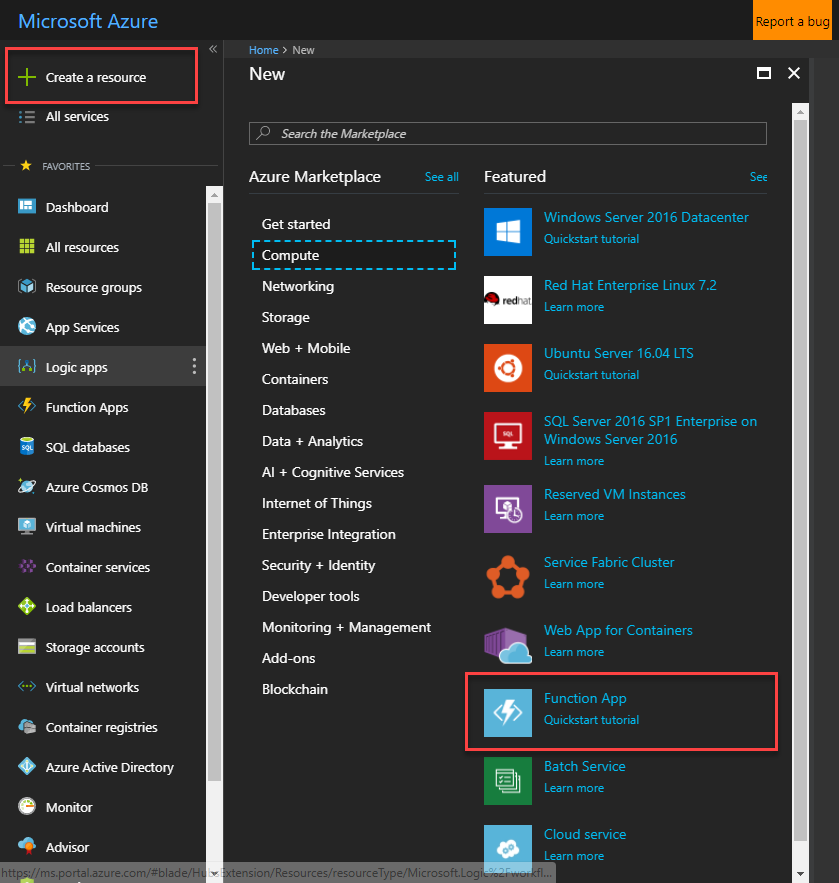
- Click the Create a Resource button and select Compute. Then select Function App.
- Set the following settings for the app:
- App name: csv-utility-functions-[yourname] (ensure this is unique)
- Resource Group: csv-utility-functions-rg
- OS: Windows
- Hosting Plan: Consumption Plan
- Location: West Europe (or as desired)
- Storage: Create new and enter a unique name
- Application Insights: Off
- Click Create. This will deploy your function app. Once this has completed, navigate to it.
Now that we have a function app to host our function, we can create the function itself.
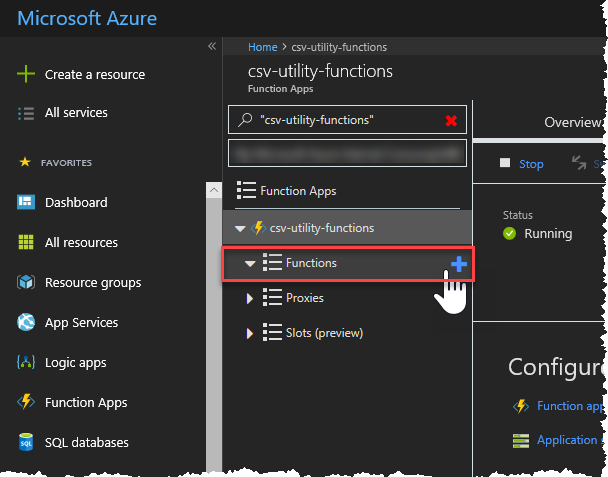
- Expand the function app, then click the + next to Functions to create a new function
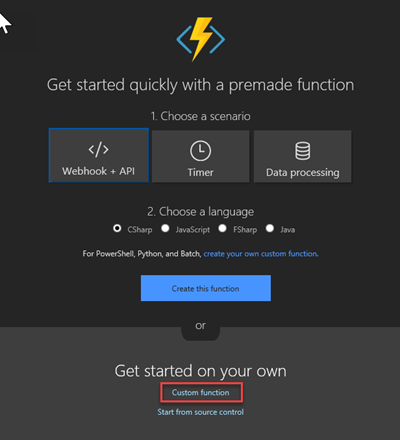
- Click the Custom Function link at the bottom of the page
- Since we want to trigger our function based on the arrival of a new blob, select the BlobTrigger - C# template.

- Set the following Azure Blob Storage trigger settings:
| Setting | Value | Description |
|---|---|---|
| Name of your function | ProcessCSVFile | The function name |
| Path | csv-files-in/{name}.csv | This is the name of the storage container where csv files to be processed will be placed, along with the template filename. |
| Storage account connection | AzureWebJobsStorage | The Storage Account to be monitored. |
- Click Create to create the new function.
Define the output blob container
Next we need to define a blob container in our storage account that we will use to store the processed csv files.
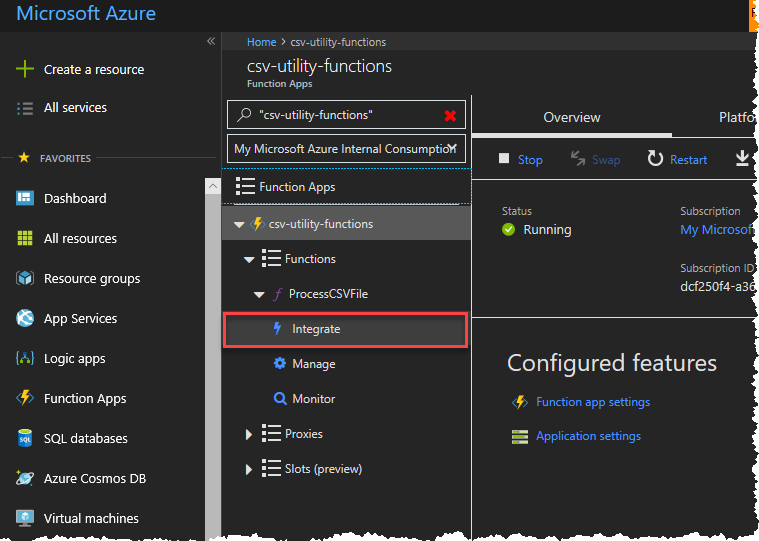
- Expand the function and click Integrate
- Under Outputs click + New Output
-
Click Azure Blob Storage then Select
- Set the following Azure Blob Storage Output settings:
| Setting | Value | Description |
|---|---|---|
| Blob parameter name | outputBlob | The variable name used in the function code to refer to the blob |
| Path | csv-files-out/{name}-processed.csv | This is the name of the storage container where the processed csv files will be placed, along with a template filename. |
| Storage account connection | AzureWebJobsStorage | The Storage Account to use. Select the same account as the input container. |
-
Click Save
-
Expand the Documentation section at the bottom of the screen and follow the instructions to download and install the Microsoft Azure Storage Explorer and connect to the storage account. The Azure Storage Explorer is a desktop application that will allow you to interact with your Azure Storage resources directly fom your PC.
-
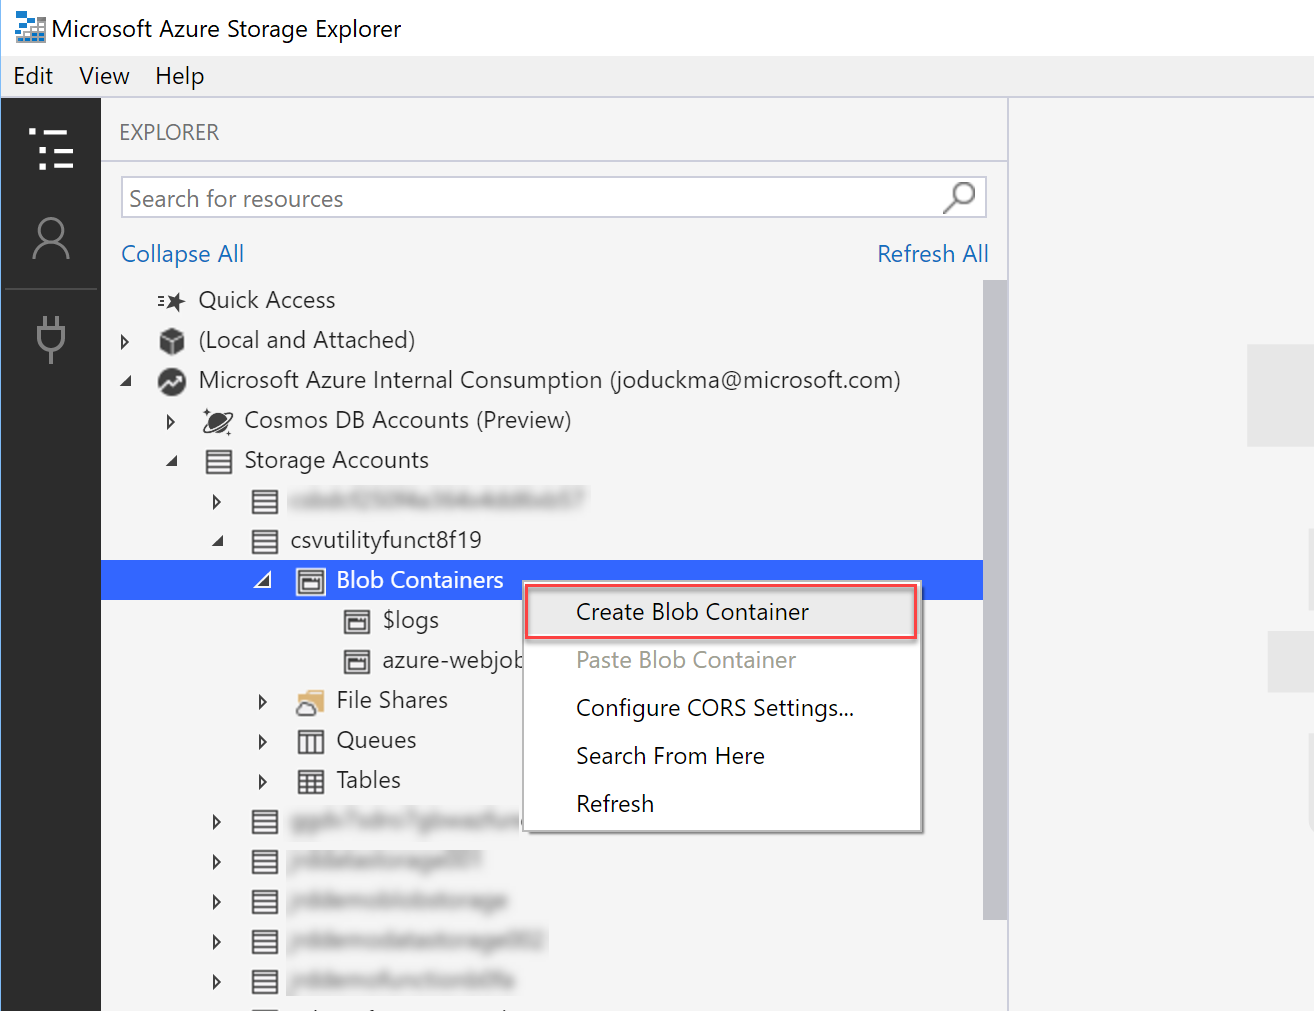
Next we’re going to create the blob container that we will uploaded our input files to (csv-files-in):
-
In the Storage Explorer, expand the storage account that you selected, right-click on Blob Containers and select Create Blob Container
- Name the new container csv-files-in
- Right-click on the new container and select Set Public Access Level
- Set the access level to Public read access for container and blobs
-
- Now repeat the above steps to create another container called csv-files-out
Add the function code
-
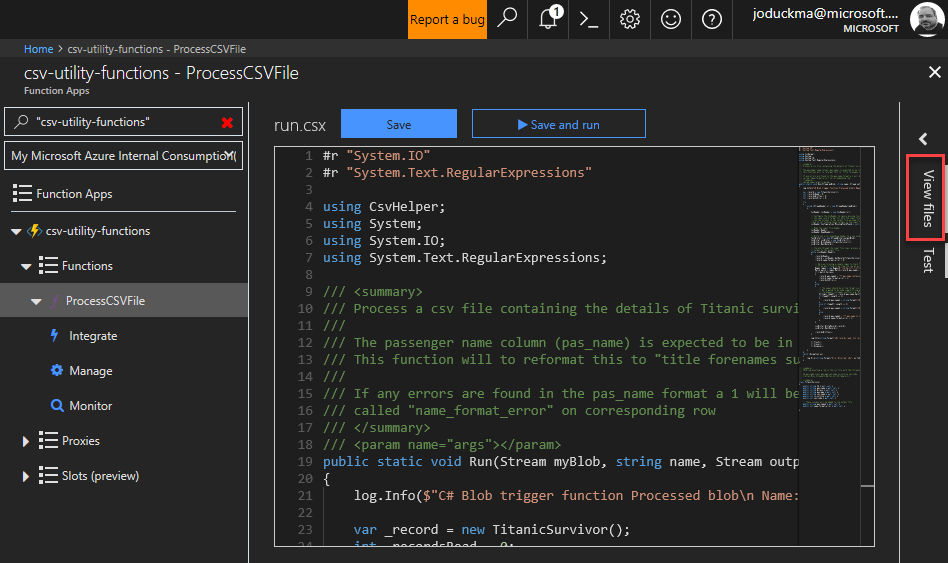
Back in the Azure Portal click on the function ProcessCSVFile to open the code editor.
-
Replace the contents of the editor window with the code in this file.
-
This code uses a third-party library called CsvHelper to process the csv file. This library is packaged as a NuGet package so in order to reference it in our code we need update (or in this case create) a project.json file containing the dependencies:
-
Save this file file to your local machine as project.json
-
Click on the View Files option on the right of the window
- Click Upload and upload the project.json file to Azure. When the upload has completed click on the file. It should look like this…
{
  "frameworks": {
    "net46":{
      "dependencies": {
        "CsvHelper": "6.0.0"
      }
    }
   }
}
- Click Save at the top of the screen. The function will be compiled and the results will be displayed in the log window at the bottom of the window If all is well you should see: Compilation succeeded.
Testing the function
To test that the function works as expected:
-
In the Azure Portal, click on the ProcessCSVFile function name and expand the Logs section so that we can see the output when the function runs.
-
Download csv data file of Titanic Survivors to your local PC.
-
Go to the Azure Storage Explorer and upload this file to your csv-files-in storage container. This will trigger your function to execute.
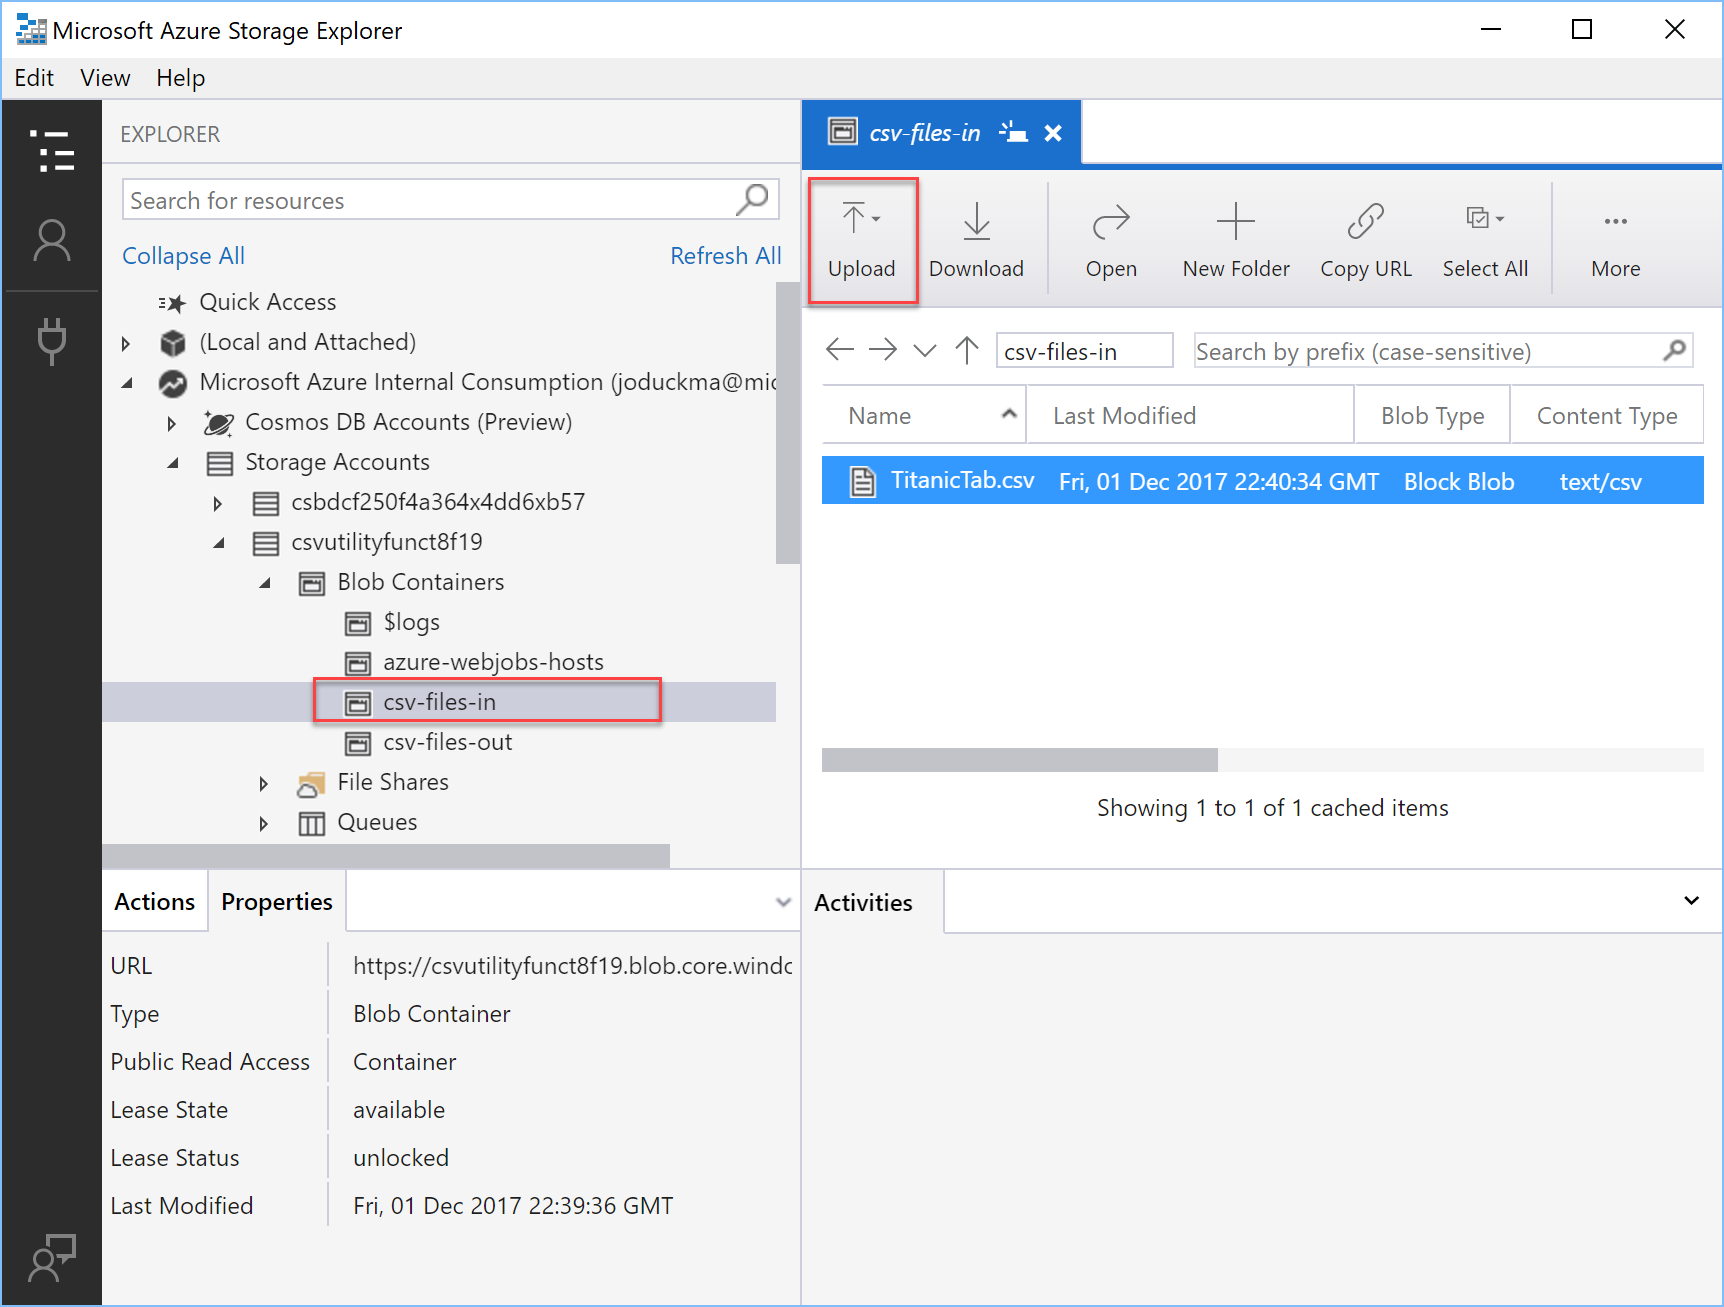
- You should see the function being triggered in the log output, and a file called TitanicTab-processed.csv in your output blob container (you can view and download this file in Storage Explorer).
Summary
- This is just a simple example of using the Azure Portal to create an Azure Serverless Function triggered by a blob appearing in Azure storage. There are many other ways to trigger a function: calling a HTTP endpoint, a message arriving on a queue, a timer, an Event Hub event etc. In addition to using the portal diretly as we did here, You can also develop your function using Visual Studio or Visual Studio Code (or your favourite editor), and deploy it from GitHub.
For more information on Functions see the Azure Functions Documentation
Leave a comment