
Node development
Before we begin, the obvious; whenever you make changes to a file, save it. If you see a white dot on a tab in VS Code it means there are unsaved changes.
Starting with a brief look at the code from the app.js source file to see how the bot works.
This section calls the modules required to run the bot – added by the NPM install referencing the config file, if you start with an empty application you can add these.
var restify = require('restify');
var builder = require('botbuilder');
var botbuilder_azure = require('botbuilder-azure');
The code below sets up the server – Node runs in itself, there is no additional application server install.
// Setup Restify Server
var server = restify.createServer();
server.listen(process.env.port || process.env.PORT || 3978, function () {
//    console.log('%s listening to %s', server.name, server.url);
});
As the comments suggest this is the connector to the bot service – the process.env.
// Create chat connector for communicating with the Bot Framework Service
var connector = new builder.ChatConnector({
    appId: process.env.MicrosoftAppId,
    appPassword: process.env.MicrosoftAppPassword,
    openIdMetadata: process.env.BotOpenIdMetadata
});
// Listen for messages from users
server.post("/api/messages", connector.listen());
Configure the connection to the table store, this handles the conversation history and state:
var tableName = 'botdata';
var azureTableClient = new botbuilder_azure.AzureTableClient(tableName, process.env['AzureWebJobsStorage']);
var tableStorage = new botbuilder_azure.AzureBotStorage({ gzipData: false }, azureTableClient);
Create the bot and then set the storage configured above:
// Create your bot with a function to receive messages from the user
var bot = new builder.UniversalBot(connector);
bot.set('storage', tableStorage);
The default bot dialog ‘/’, below is the action if there are no instructions from the application to send the response elsewhere, but for the app currently, this is it, a simple session.send that sends the message to the user, a string appended with the message.text, entered by the user, triggering the application.
bot.dialog('/', function (session) {
    session.send('You said ' + session.message.text);
});
If you start the app (node app.js) and open the Bot Emulator and type a message, the service will accept the message without error, but you will not get an echo back. We know the code works because it was tested in Azure, the different behaviour between Azure and the emulator suggests an environmental variable is missing, in this instance it is the bot storage. To test, comment out the following line by clicking on the line below and pressing CTRL-/ (to add the // to each line, which Node treats as comments, not code and will therefore not try to execute it)
bot.set('storage', tableStorage);
If you try now the bot echo will work however, the fix would replicate in Azure, so we need to get it working properly. CTRL-/ to remove the comments. If you trace the storage code back…
bot.set('storage', tableStorage);
References tableStorage…
var tableStorage = new botbuilder_azure.AzureBotStorage({ gzipData: false }, azureTableClient);
References azureTableClient…
var azureTableClient = new botbuilder_azure.AzureTableClient(tableName, process.env['AzureWebJobsStorage']);
azureTableClient references the environment variable process.env[‘AzureWebJobsStorage’], which does not exist locally.
In my experience, if something works in Azure and not locally, as in this instance, or vice versa, then you should start with the environmental variables. There is the option to define AzureWebJobsStorage in the application, but that’s not secure. We will set this up to show how to protect the key. Firstly, we need to get the AzureWebJobsStorage key – from the Azure portal, in the storage account keys.
In the Azure portal open the bot resource group - if you are currently in the bot blade, go to the Overview, as below, and click on the Resource group link. You should see a list similar to the one below.
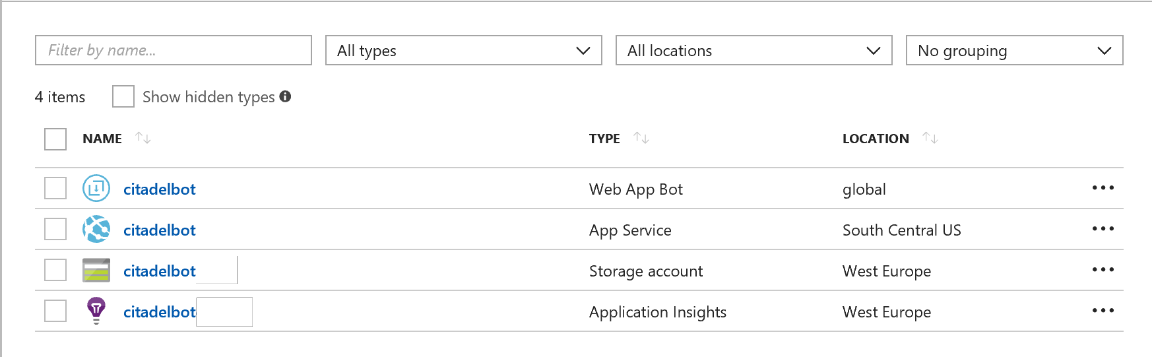
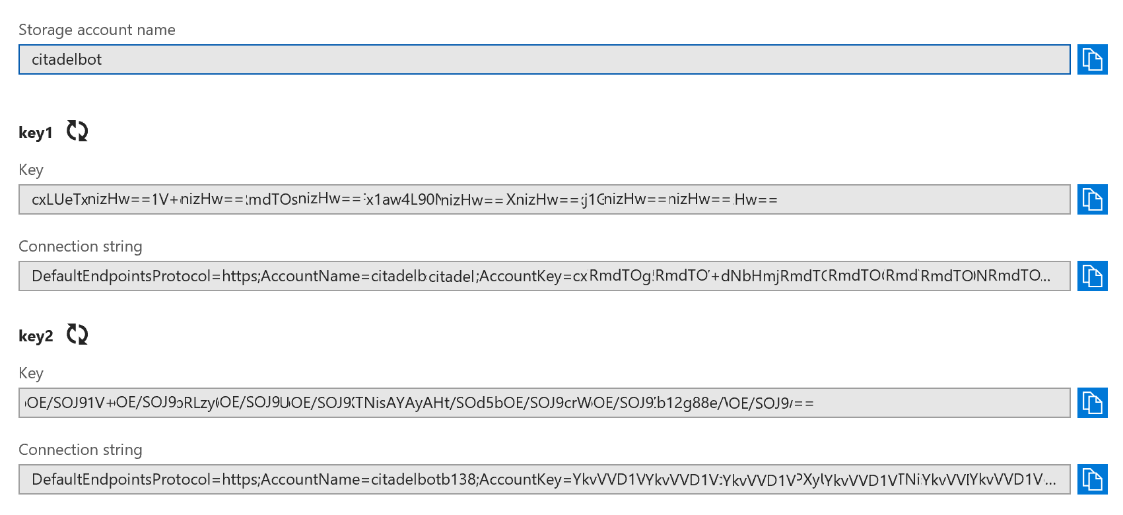
Select the Storage account. The bot data is stored in Tables. From the SETTINGS menu click on Access keys. This will display key1 and key2. Copy the Connection String for key1.
This key has added to the bot service when the bot was deployed, but, for completeness it can be found by going back to the Web Bot App blade. Under SETTINGS click on Application settings. In the Application Settings the top entry should be 'AzureWebJobsStorage', with the entry of the connection string.
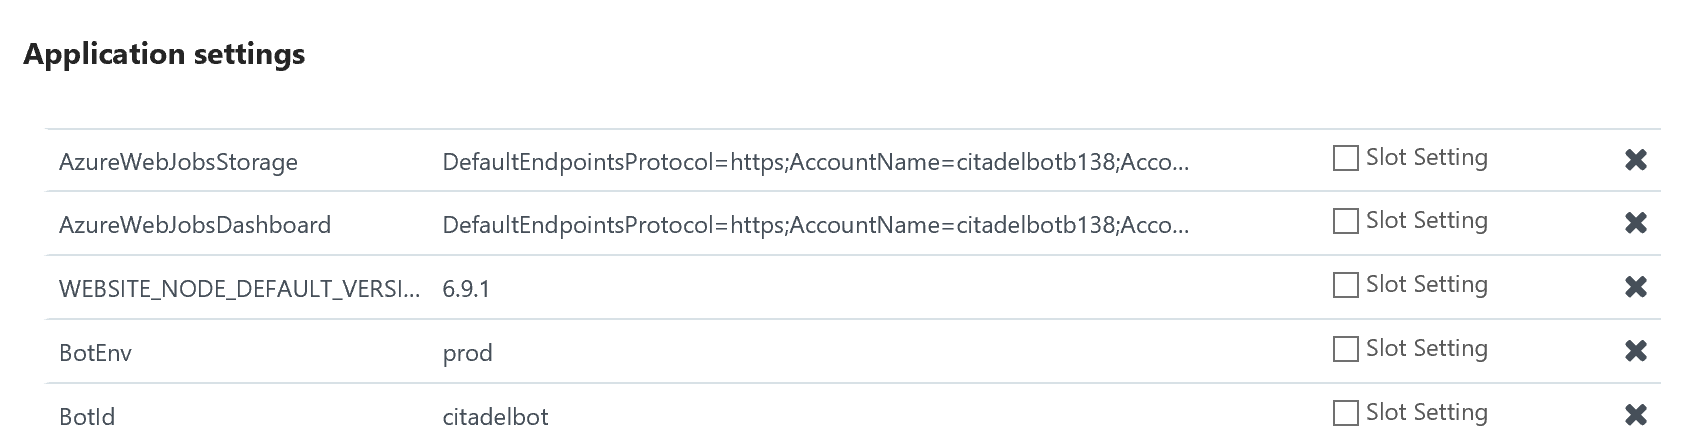
If you have connection strings, secrets, keys, that you need for your application, add them here or in Key Vault to keep them from being coded into the application, only users with admin access to the app or Key Vault will be able to see the keys.
While you have the keys, now might be a convenient time to set up the Azure Storage Explorer, if not, come back to that when you need it.
Go back to VS Code. As we do not want the connection string stored in the code we need to create a file for the environment options. In the root document tree, ie, not in one of the folders, right click 'New File', call the file dev.env – I could have called it .env, that would work too. Type the following line:
process.env.AzureWebJobsStorage='<ConnectionString>'
As we want to keep this information private we need to stop this file from being uploaded to git repositories. Click on the .gitignore file and add *.env Adding dev.env to gitignore would work, but this will catch any other .env files, should you add them later, in theory, you don't need it here. Note the node_modules folder is in the gitignore file, this prevents hundreds, or more likely, thousands of files being pushed.
The final step, we need to tell the application to use the dev.env file when the application runs, but we only want to do this in the local, development environment, not production – this file won't be in Azure and would cause an error as the application would be looking for a file that does not exist. Add this code below the first three require variables.
// Setup for the Dev Environment
if (process.env.NODE_ENV == 'development') {
     var env = require('./dev.env');
}
As you can guess, this looks at the node environment to see if it is development, and if it is requires the dev.env file.
If your application is running, stop it with CTRL-C.
Run the application using nodemon – this restarts the service automatically every time the application is saved, as mentioned, if you run using node app.js you will need to stop and restart every time you update the app - type the following:
nodemon app.js
The application should now run, and echo back.
If the app is not working it is likely that the application is not running in development mode. CTRL-C to stop the app. In the terminal type the following.
export NODE_ENV='development'
The above is one way to set the environment as development, that I use, there are others. Note: if you restart VS Code you will need to set this again.
It took a little while to get here, but you should now have everything set up correctly, and the bot is working. Go to the source control icon, write the comment at the top and commit the changes. Click the Synchronize Changes icon at the bottom to push to Team Services, and Azure. You can check in Azure that all is working as it should – just note, it can take a little while for the changes to sync across – you can confirm the status in the portal, in the Build, Continuous Deployment blade. Or make subtle changes to the bot text when you edit the code.
We now have a bot that works, but it's a little dull. We are going to add a few more features, starting with the basics.
First, we need to comment out the Bot dialog, highlight the code below and press CTRL-/ to comment the code out, alternatively you can just delete it.
bot.dialog('/', function (session) {
      session.send('You said ' + session.message.text);
});
We will now add in a Waterfall, this is a structured list of questions to get information for the user, as an example this could be an order form or part of curated troubleshooting. Copy the Waterfall Q and A code at the end of the app.js file – this is just a sample to see how it works, the arbitrarily selected theme is spirit animals – you will understand the context of this, if not the sense, later.
// Waterfall Get info
bot.dialog('/', [
    function (session) {
        builder.Prompts.text(session, 'Hello. What\'s your name?');
    },
    function (session, results) {
        session.userData.name = results.response;
        builder.Prompts.number(session, 'So, ' + results.response + ', how many years have you believed in spirit animals?');
    },
    function (session, results) {
        session.userData.coding = results.response;
        builder.Prompts.choice(session, 'What spirit animal would you prefer?', ["tiger", "lion", "frog"]);
    },
    function (session, results) {
        session.userData.animal = results.response.entity;
        session.send('Got it... ' + session.userData.name +
                    ', you\'ve been in the spirit animal game for ' + session.userData.coding +
                    ' years and quite fancy yourself a ' + session.userData.animal + '.');
        session.endDialog();
    }
]);

// End of the waterfall
The code is easy to read; each function asks the user a question and with the proceeding function retrieving the results and writes the response into a session.userData variable. There is a slight variation in the Prompts that validates the user input between:
- Prompts.text – looks for a string
- Prompts.number – will only accept numbers
- Prompts.choice – this option will accept either the number of the option or if a user types the response as displayed.
At the end the code sends back a string made up of text and the results.
The session.endDialog() ends the dialog, without this, and it is not noticeable here, but it can cause the bot to get stuck in a loop.
The bot is still one dimensional, but the waterfall and data collection are useful to understand. To add a little personality, we can make the bot welcome users.
The bot.on method is triggered by conversationUpdate, a change to the conversation such as a new user. Add the following code before the waterfall.
// detect new users
bot.on('conversationUpdate', function (message) {
    if (message.membersAdded) {
        message.membersAdded.forEach(function (identity) {
            if (identity.id === message.address.bot.id) {
                bot.beginDialog(message.address, 'greet');
            }
        });
    }
});
There are a number of variations on the above, this one simply loops through each new user, determined by their unique message address. For each user it triggers the greet dialog which sends a simple welcome message.
// dialog to send a greeting
bot.dialog('greet', [
    function (session, args) {
        session.send('Spirit animals, baby, that\'s what this bot\'s all about!');
        session.endDialog();
    }
]);
If you run the bot it will give the welcome message, which is nice, and also prompts a user action.
Use the Azure Storage Explorer if you want to see how the data is stored – instructions here if you have need them. Delete your user data to be forgotten and begin again. You will be listed as 'Default User', from the emulator, if you were using a client such as Skype or Facebook Messenger, with a fixed address, this will have a unique id.
Change the original waterfall, from earlier, to stop it picking up the conversations by either changing the name from / to GetInfo, or commenting it out / deleting it:
// Waterfall Get info
bot.dialog('GetInfo', [
Let's now have the bot collect some data from the user using a slightly more advanced waterfall. Where the initial waterfall collected information about the user and stored that individually, we will create a Profile object to handle the user's details, and use next() to skip ahead if the data has already been collected.
bot.dialog('ensureProfile', [
    function (session, args, next) {
        session.dialogData.profile = args || {}; // Set the profile or create the object.
        if (!session.dialogData.profile.name) {
            builder.Prompts.text(session, 'Hello. What\'s your name?');
        } else {
            next(); // Skip if we already have this info.
        }
    },
    function (session, results, next) {
        if (results.response) {
            // Save user's name if we asked for it.
            session.dialogData.profile.name = results.response;
        }
        if (!session.dialogData.profile.animal) {
            builder.Prompts.choice(session, 'What spirit animal would you prefer?', ["tiger", "lion", "frog"]);
        } else {
            next(); // Skip if we already have this info.
        }
    },
    function (session, results) {
        if (results.response) {
            // Save animal name if we asked for it.
            session.dialogData.profile.animal = results.response.entity;
        }
        session.endDialogWithResult({ response: session.dialogData.profile });
    }
]);
The dialog, ensureprofile, won't do anything until it is called – we can do this from the bot setup, update the var bot (and bot.set('storage'… line) to the code below:
var bot = new builder.UniversalBot(connector, [
    function (session) {
        session.beginDialog('ensureProfile', session.userData.profile);
    },
    function (session, results) {
        session.userData.profile = results.response; // Save user profile.
        session.send(`Great, ${session.userData.profile.name}! I love ${session.userData.profile.animal}s!`);
    }
]).set('storage', tableStorage);
A note on the above, you will keep getting the same message each time you reload the bot, but in a real-world application, this will happen a lot less, as most clients will persist the conversation.
Next: Cognitive Services
Leave a comment