
Overview
In this lab we will use Visual Studio Code and Visual Studio Team Services to create a continuous integration/continuous deployment pipeline to deploy a Node.js application to Azure App Service using an ARM Template.
The high-level flow is:
- Install the pre-requisite applications
- Generate a simple Node.js Express application
- Commit the application code to a local Git repo
- Creation of a VSTS project and code repo
- Push of the local git repo into VSTS
- Create a VSTS Build Definition to build ( & optionally test) the application
- Update the build definition to deploy the app to Azure App Service using an ARM Template.
- Setup Azure Application Insights to monitor the application

Ensure you have all the pre-requisites installed before starting the main lab.
Create Node.js / Express Web App
Express is a minimal, flexible web application framework for Node.js developers that provides a robust set of features for both web and mobile web developers.
Since this lab is focused on showing how to deploy a Node.js app to Azure rather than on the development of the app itself, we will just use a simple generated app in order to demonstrate the principles involved. To generate the app we will use Express’s application generator tool.
Open a CMD or PowerShell window and run the following commands:
mkdir \devops-lab-workspace
cd \devops-lab-workspace
npm install -g express-generator
express --view=pug --git myapp
cd myapp
The above commands first create a development workspace directory on your local machine and then use NPM (Node Package Manager) to install the Express generator. Then we run the generator to create a new boilerplate application called myapp in your workspace.
view=pug This option tells the generator to use the Pug templating engine (formerly known as Jade) to generate the app.
Now let’s start Visual Studio Code and open your project:
code .
Press Ctrl+' to open the built-in terminal window and run:
npm install
npm start
Ensure that the Terminal tab is selected in VSCode. You may see a Windows Firewall security alert for Node.js. If you do, select Allow Access.
This will start the Node/Express webserver which will be listening on port 3000, so open http://localhost:3000 in your browser to see your app.
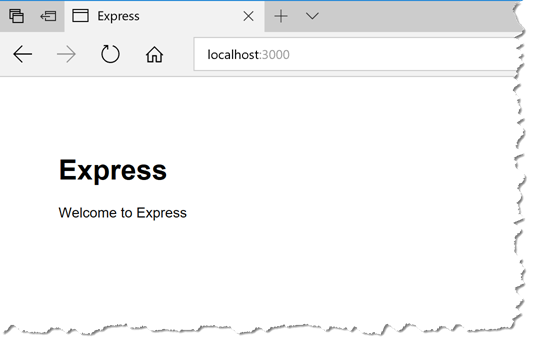
Press Ctrl+C in your VSCode terminal to stop Node from running.
This is a VERY basic app, but remember we’re not focused on writing the best web app ever, just on creating something that we can deploy to Azure as an example. But let’s create a more realistic looking app:
-
Click here to see what changes you need to make to the code.
-
Once you have made the above changes, type
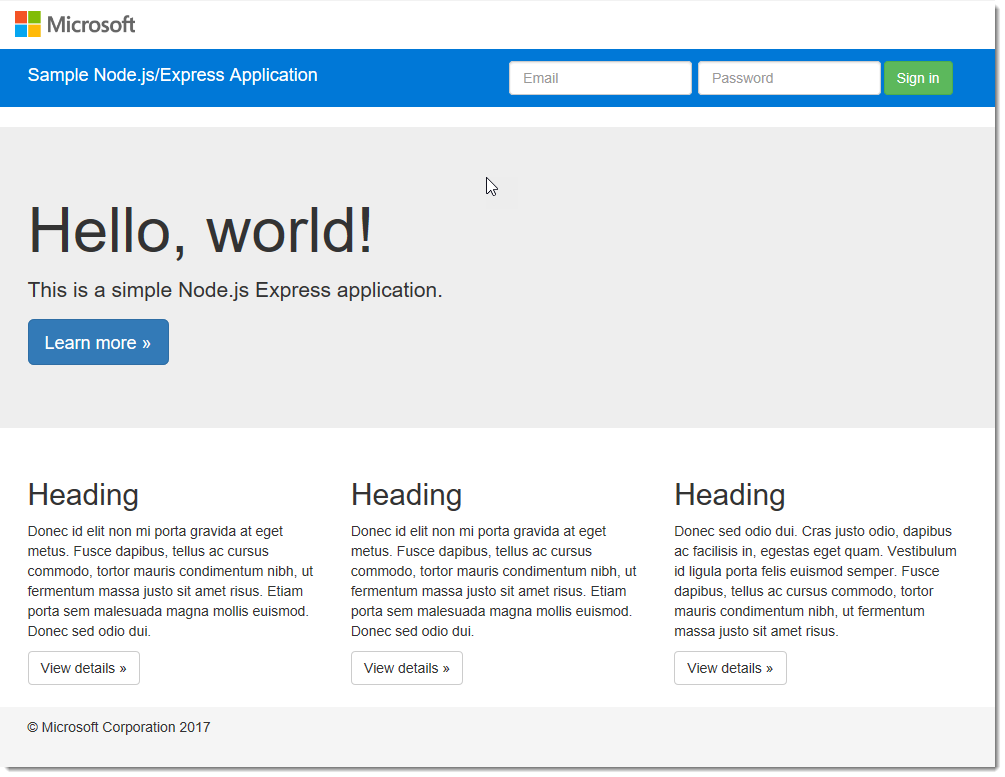
npm startagain in the terminal window then open http://localhost:3000 in your browser (or refresh the previous window if you still had it open) to see your updated app.
It should look something like this…
Next, in order to make our app easier to deploy to Azure, we need to change the location and name of the startup script that was generated by Express…
-
Press
Ctrl+Cin your VSCode terminal to stop Node from running. -
From VSCode, press
Ctrl+'to open the built-in terminal window and run the following PowerShell commands:
Move-item bin/www server.js
(Get-Content server.js).replace('../app', './app') | Set-Content ./server.js
(Get-Content package.json).replace('./bin/www', 'server.js') | Set-Content ./package.json
Let’s test that our changes worked. Type:
npm start
The webapp should start successfully. Open http://localhost:3000 in your browser to see your app.
Press Ctrl+C in your VSCode terminal to shutdown the Node server.
Create a Git repo
To start to build a CI/CD pipeline we need our code under source control so let’s create a Git repo and add our code to it. From the integrated terminal run:
git init
git add .
git status
You should see all your application files listed in green text. If you see files in the node_modules directory, you probably omitted the
--giton the Express Generator command earlier.
The source files are now “staged” in Git. The next step is to commit them to the repo.
git commit -m "First commit"
Push the application code up to VSTS
At this point our source code is in a repository on our local machine.
To get the application code up into VSTS, we first need to create a new VSTS project to hold it, and then we’ll need to set our VSTS project as the remote origin for our Git repo and run a push to push the code up to the remote origin.
To create the new VSTS project:
- Using your web browser, login to VSTS.
- From the home screen, create a new project by clicking New Project. Call it DevOpsLab
- When creating the new project leave all the options at the default, except the Share With option. Change this from Everyone in Microsoft to Team Members.
Now that we have a project, we need to upload our application code into it using Git.
Note: You will get the correct URL & syntax for the following commands by expanding the ‘or push an existing repository from command line’ section of your project start page or from the ‘code’ hub in VSTS.
Copy these commands to the clipboard (Ctrl-C) and return to your VSCode terminal window. Paste the commands here (Ctrl-V).
git remote add origin https://<vsts-account>.visualstudio.com/_git/DevOpsLab
git push -u origin --all
If you have the Git Credential Manager installed, a VSTS authentication window should automatically pop up, so login here with your VSTS account details.
If you have trouble and you get a username/password prompt at the command line, you have the option of manually creating git credentials by going into Code > Generate Git credentials in VSTS.
You can validate this has worked by looking in the Code hub (the menu option across the top of the screen) in VSTS. You should see your application code files.
We now have our application code in a shared source code repository in VSTS!
Create a Build Definition in VSTS
Our next step is to create a build definition to tell VSTS how to build our application…
-
From the Code hub in VSTS, click the Set up build button at the top-right of the screen.
-
When you are prompted to select a template, select Empty process.
-
VSTS will automatically generate the name DevOpsLab-CI for your build definition. This is OK but it’s not very descriptive, so let’s change it to Build My Node App.
Sidenote: About Agent Pools & Queues
In a typical development organization there are many teams working on several development projects at the same time, and each of these projects will require build servers to build their application from source code and to run other build activities such as automated tests etc. To allow for the builds to be automated, each server has software installed onto it called a Build Agent. Because there are often many build servers in an organisation, they are grouped into Pools (typically partitioned by type or team), and build jobs are scheduled using an Agent Queue.
-
With VSTS you don’t need to provide your own build agents (though you can if you want to). You can simply share agents that are already hosted on Azure. To do this select the Hosted agent queue.
-
In the task list for this build definition on the left-hand side of the window, click Get sources to select the location of the source code you want to build, and ensure that these options are set:
- From: This project
- Repository: DevOpsLab
- Branch: master
- Clean: false
-
Now we’re going to add a task to run Node.js’s npm install command:
-
On the Phase 1 phase click + to add a task.
-
We’re looking for the npm task. In the search box enter npm to find the npm task. Select it and click Add.
-
Click on the new task in the left pane. The following parameters should already be set for this task:
- Display name: npm install (default)
- Command: install (default)
This command will download all the npm packages that we need to run our application, as we did on our local workstation earlier.
-
-
Next we need to zip up the application files into an archive file to save space on our server and make the build easier to manage.
-
Click the ‘+’ again to add a new task, and this time search for Archive to find the Archive Files task.
-
Click Add.
-
Set these parameter values:
- Display name: Archive files (default)
- Root folder (or file) to archive: . (dot)
- Prefix root folder name to archive paths: (unchecked) NOTE: This defaults to checked
- Archive type: zip
- Archive file to create: $(Build.ArtifactStagingDirectory)/$(Build.BuildId).zip
- Replace existing archive: (checked)
Note the use of build variables here.
-
-
Finally, having built the app we need to publish our build artifacts somewhere so we can use them. Add another task and this time search for
Publishto find the Publish Build Artifacts task.-
Click Add
-
Click on the Publish Artifact task. The required parameters are highlighted in red.
- Path to Publish: $(Build.ArtifactStagingDirectory)
- Artifact Name: drop
- Artifact Type: Visual Studio Team Services/TFS (default)
-
-
We don’t need to add any more tasks to our build at this point, so just click Save & queue at the top-right of the window to finish. This will save the build definition, but will also queue a build to be executed.
-
You will be prompted for the build parameters. Just leave the defaults and click Save & queue.
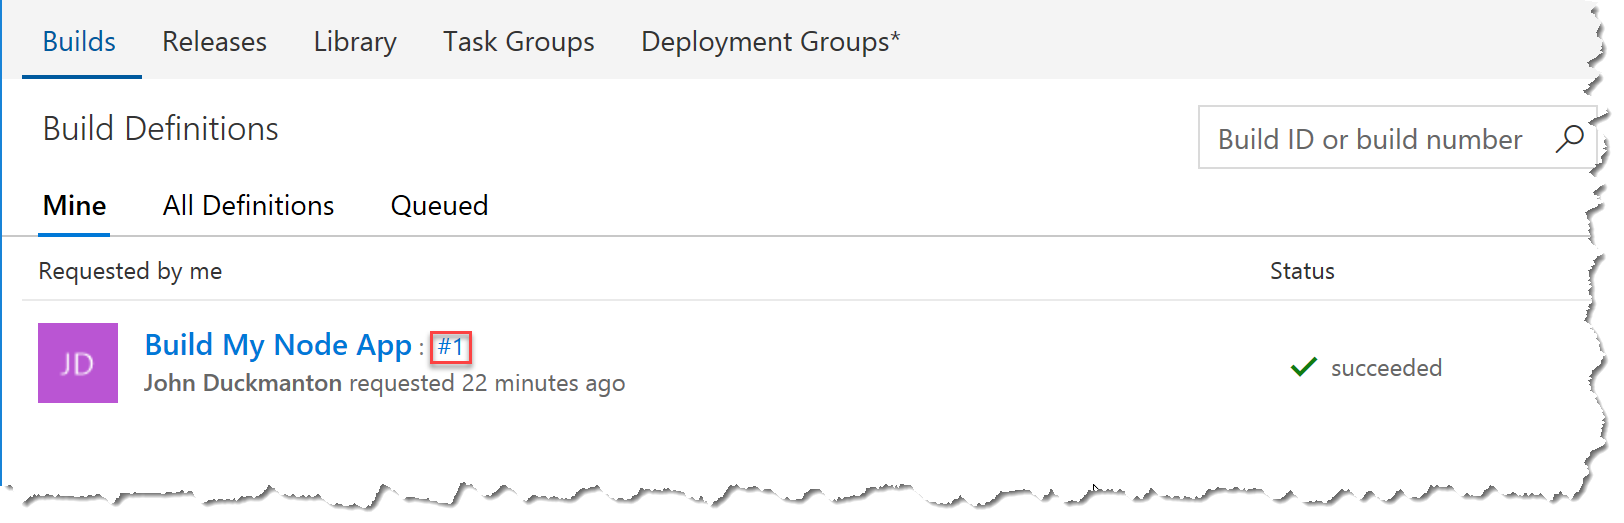
At the top of the screen you will see a notification message saying something like ‘Build #1 has been queued.’. Click on the build number to view the build details.
Here you will see the progress of the build tasks as they execute along with their output in the console window. Let the build run to completion.
Viewing Your Builds
- Select Builds from the Build and Release hub at the top of the screen.
This option shows you a history of all the builds that you executed along with the status and other useful information.
-
Click on the build number next to your build definition (the small number preceded by #)
-
Click on Artifacts.
- Click the Explore button next to your application root folder. This will open the Artifacts Explorer window.
- Expand the root folder and examine the build artifacts. You should see a zip file. When you are done click Close.
Next, we’ll look at how to deploy our app to Azure taking an Infrastructure as Code approach.
Define the Azure Resources for our App
Infrastructure as Code & ARM Templates
Infrastructure as Code (IAC) is an approach to defining the hardware, software, networking and other resources required for an environment in machine-readable definition files that can be used to provision those resources automatically. This approach has several key benefits over traditional approaches in that the definition files can be version-controlled in the same way as source code. In addition, since the provisioning process is automated it is much faster & more reliable, and the risk associated with human error is significantly reduced.
Azure Resource Manager is the service in Azure that manages the provisioning of all resources. It has an API that can be accessed through several means including the Azure Portal, PowerShell or Azure CLI commands, or via a REST API. With Resource Manager you can create a template in JSON format that defines the resources and configuration you wish to be provisioned. That template is known as an ARM Template and is an example of Infrastructure as Code.
For more information on Azure Resource Manager, see Azure Resource Manager Documentation
To create an ARM Template for our application deployment…
- On your workstation, go back to your VSCode project.
- Select File > New File.
- Copy and paste the following JSON into the new file:
{
    "$schema": "https://schema.management.azure.com/schemas/2015-01-01/deploymentTemplate.json#",
    "contentVersion": "1.0.0.0",
    "parameters": {
        "myWebAppName": {
            "type": "string"
        },
        "myAppServicePlanName": {
            "type": "string",
            "minLength": 1
        },
        "myAppServicePlanSKU": {
            "type": "string",
            "allowedValues": [
                "Free",
                "Shared",
                "Basic",
                "Standard"
            ],
            "defaultValue": "Free"
        },
        "myAppServicePlanWorkerSize": {
            "type": "string",
            "allowedValues": [
                "0",
                "1",
                "2"
            ],
            "defaultValue": "0"
        }
    },
    "resources": [
        {
            "name": "[parameters('myAppServicePlanName')]",
            "type": "Microsoft.Web/serverfarms",
            "location": "[resourceGroup().location]",
            "apiVersion": "2014-06-01",
            "dependsOn": [],
            "tags": {
                "displayName": "myAppServicePlan"
            },
            "properties": {
                "name": "[parameters('myAppServicePlanName')]",
                "sku": "[parameters('myAppServicePlanSKU')]",
                "workerSize": "[parameters('myAppServicePlanWorkerSize')]",
                "numberOfWorkers": 1
            }
        },
        {
            "name": "[parameters('myWebAppName')]",
            "type": "Microsoft.Web/sites",
            "location": "[resourceGroup().location]",
            "apiVersion": "2015-08-01",
            "dependsOn": [
                "[concat('Microsoft.Web/serverfarms/', parameters('myAppServicePlanName'))]"
            ],
            "tags": {
                "[concat('hidden-related:', resourceGroup().id, '/providers/Microsoft.Web/serverfarms/', parameters('myAppServicePlanName'))]": "Resource", "displayName": "myWebApp"
            },
            "properties": {
                "name": "[parameters('myWebAppName')]",
                "serverFarmId": "[resourceId('Microsoft.Web/serverfarms/', parameters('myAppServicePlanName'))]"
            }
        }
    ]
}
- Save this file as azuredeploy.json into the root folder of your project. The location of your file doesn’t really matter, but it will make it easy for use to find it later on.
Let’s take a moment to explore the file to understand what it is doing:
The “parameters” section defines a number of parameters that we will pass into the template when we execute it to provide unique names or values for resources such as the name of our application. This approach allows us to reuse the template in different situations by simply supplying different parameters when the template is executed.
    "parameters": {
    "myWebAppName": {
        "type": "string"
    },
The “resources” section is where we start to define the resources we need.
    "resources": [
    {
        "name": "[parameters('myAppServicePlanName')]",
        "type": "Microsoft.Web/serverfarms",
        "location": "[resourceGroup().location]",
        "apiVersion": "2014-06-01",
        "dependsOn": [],
        "tags": {
            "displayName": "myAppServicePlan"
        },
In this template we are requesting an App Service Plan "type": "Microsoft.Web/serverfarms" and then a website "type": "Microsoft.Web/sites".
Since our ARM Template has some parameters, we also need to create a file to define the parameters we want to supply for this specific deployment:
- In VSCode, select File > New File or press
Ctrl-n. - Copy and paste the following JSON into the new file:
{
  "$schema": "https://schema.management.azure.com/schemas/2015-01-01/deploymentParameters.json#",
  "contentVersion": "1.0.0.0",
  "parameters": {
    "myAppServicePlanName": {
      "value": "my-service-plan"
    },
    "myAppServicePlanSKU": {
      "value": "Basic"
    },
    "myAppServicePlanWorkerSize": {
      "value": "0"
    },
    "myWebAppName": {
      "value": "changeme"
    }
  }
}
- Save this file as azuredeploy.parameters.json into the same location as the azuredeploy.json file.
You will see that there is now a ‘2’ label on your Source Control icon in the toolbar. This indicates that you have two uncommitted files.
-
Press
Ctrl-Shift-Gto go to the Source Control view, where you will see the new files listed. -
Enter ‘Added ARM Template’ into the message box and press
Ctrl-Enterto commit the changes. You may see a message saying `There are no staged changes to commit. Would you like to automatically stage all your changes and commit them directly?’ Click Always. -
Next, click on the ‘…‘ icon at the top of the Source Control pane and select Push to push the commit up to VSTS.
We’re going to need to refer to our ARM Template files during our release deployment, so we need to include them in the build:
-
IN VSTS, click on the Build and Release hub and select Builds.
-
Click on the Build My Node App build to open the build definition and click Edit.
-
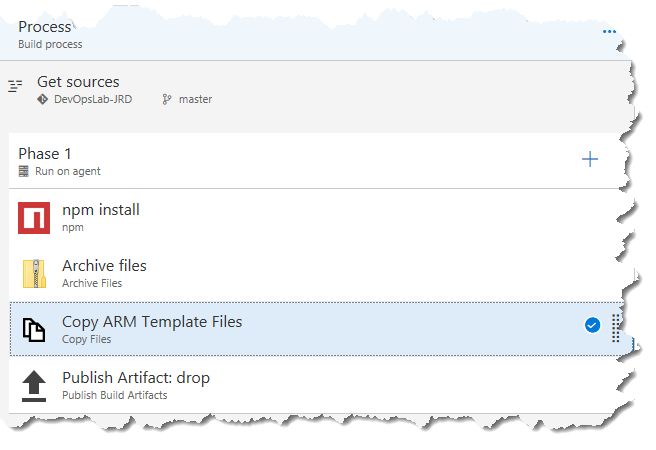
Add a Copy Files task and this time set these parameter values:
- Display name: Copy ARM Template Files
- Source folder: . (dot)
- Contents: azuredeploy.json
azuredeploy.parameters.json (make sure you put each filename on a separate line) - Target Folder: $(Build.ArtifactStagingDirectory)
-
Drag this task so that it is positioned between the Archive task and the Publish task.
Automating the Build
At this point our build has to be executed manually. That’s not really a DevOps approach. So whilst we’re editing the build definition, we’ll update it so that it is triggered automatically when new code is committed into the repository.
-
Click on the Triggers tab
-
Under Continuous Integration, Enable the Trigger. Our repository and the master branch should already be selected.
-
Click the down-arrow next to the Save & queue button and select Save. We don’t need to queue a build this time as it will now trigger automatically when we commit code changes.
-
In the dialog, you can enter a comment if you wish, then click Save.
Now let’s test that our changes work by making a change to the code:
-
Go back into VSCode and open the file index.pug
-
Change the text on line 16
a.navbar-brand(href='#') Sample Node.js/Express Applicationto add My
a.navbar-brand(href='#') My Sample Node.js/Express Application -
Save the changes by pressing
Ctrl-S
Notice the 1 label on the Source Control icon in the sidebar indicating that we have one uncommitted change.
-
Click on the Source Control icon (or press
Ctrl-Shift-G) -
Enter a message in the text box to describe your change and press
Ctrl-Enter(or click the tick icon) to commit the changes locally. -
Next we need to push the changes up to the VSTS server. Click the More menu option (the … icon) and select Push.
-
Go back to VSTS and look at your builds. You should see that a new build has been started automatically. When the build completes. Examine the build artifacts to make sure that we have the zip file and the ARM template files.
Deploying to Azure
Now we’re going to deploy our app to the Azure App Service using VSTS. to do this we need to create a Release Definition…
- From the Build & Release hub, select Releases.
- Click New definition.
- Select the Deploy Node.js App to Azure App Service template and click Apply.
- Enter Staging as the Environment Name and close the ‘Environment’ panel.
- Under the Pipeline tab, on the Artifacts panel click Add and enter the following properties:
- Source Type: Build (default)
- Source (Build Definition): <your build definition> (Build My Node App)
- Default version: Latest (default)
- Source Alias: <your build definition> (Build My Node App)
- Click Add.
The template has created one target environment for you (which we named Staging) along with one deployment task for this environment called Deploy Azure App Service. However, you will see a red exclamation mark (!) against the Tasks tab indicating that some of the task settings need attention.
- Click on the Tasks tab.
- Enter the following missing parameters for the Staging environment:
-
Azure subscription: <select your subscription>
You may see a message saying ‘Click Authorise to configure Azure service connection’. In this case, click Authorise. This will create a Service Principal to allow VSTS to connect to Azure.
-
App service name: MyWebApp-<your initials>-$(Release.EnvironmentName)
Release.EnvironmentName is a Release Variable that represents the current environment name, in our case ‘Staging’. Using a variable is a good practice that helps us to avoid hardcoding specific values into our definition, making it more flexible and less prone to errors. See here For a full list of the release variables available.
-
So now we’ve created a task will deploy our app to our staging web server on Azure, but at this point the deployment would fail since we haven’t yet provisioned the web server. We have the server resources we need specified in our ARM Template so we just need to add a task to create our resource group from the template before we execute this task. Let’s set that up now…
- Click on the ’+’ next to Run on Agent to add a new task.
- In the Add tasks pane, search for ‘Resource’, select the task called Azure Resource Group Deployment and click Add.
- Select the new task and drag it above our Deploy Azure App Service task.
- Set the following task parameters:
- Azure subscription: <select your subscription>.
- Resource group: MyAppRG-$(Release.EnvironmentName)
- Location: <your preferred location> e.g. West Europe.
- Template: Click on the ‘…’ and navigate the folder structure to select azuredeploy.json.
- Template parameters: Click on the ‘…’ and navigate the folder structure to select azuredeploy.parameters.json.
-
Override template parameters: Click on the ‘…’ to open the editor window and specify the following:
- myWebAppName: MyWebApp-<your initials>-$(Release.EnvironmentName)
- myAppServicePlanName: MyAppServicePlan
- myAppServicePlanSKU: Basic (default)
- myAppServicePlanWorkerSize: 0 (default).
myWebAppName will form part of the FQDN of your application in Azure and as such it MUST be unique. To achieve this, we’re appending your initials (or some other unique string) + the environment name onto the name.
When we deploy our app we want to run a quick test to ensure the app works correctly.
-
Add a new task called Cloud-based Web Performance Test.
-
Click on the task and set the following parameters:
- Display name: Quick Web Performance Test (default)
- VS Team Services Connection: (default)
- Website Url: (enter the Url of your website on azure) This will be http://MyWebApp-<your initials>-$(Release.EnvironmentName).azurewebsites.net
- Test Name: Deployment Smoke Test
- User Load: 25 (default)
- Run Duration (sec): 60 (default)
- Load Location: Default (default)
- Run load test using: Automatically provisioned agents
- Fail test if Avg. Response Time(ms) exceeds: 0 (default)
Now we’ll finalise the parameters for our release definition and run it…
-
Click on Agent Phase Run on Agent
-
Change Agent Queue to Hosted
-
At the top-left of the screen, click on the release definition name (New Release Definition) and rename it to MyApp Release Definition.
-
At the top of the screen click Save. If prompted to enter a comment, just cick OK.
VSTS Artifact Version History
You may be wondering why you were prompted to enter a comment. This is because VSTS versions all changes to a Release Definition (and in fact other artifacts too, such as Build Definitions). You can view previous versions under the History tab on the definition. Here you can compare the historical versionss against the current, and you can even revert to a previous version. So in a production environment, it’s a good idea to enter a comment when you save your changes to help you to identify each version in the future.
Testing the release
Once we know that the release definition works as expected, we’ll update it to be triggered automatically by the build, but for now we need to manually schedule a release in order to test it.
-
Click the ‘+ Release’ button to the right of the save icon and select Create release.
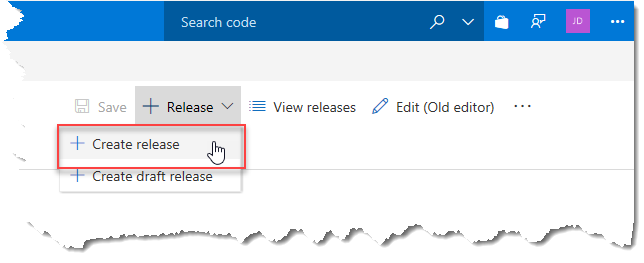
-
Optionally enter a release description and click Queue.
-
You will see a notification that your release has been created. Click on the release number in the notification to view the progress of the release.
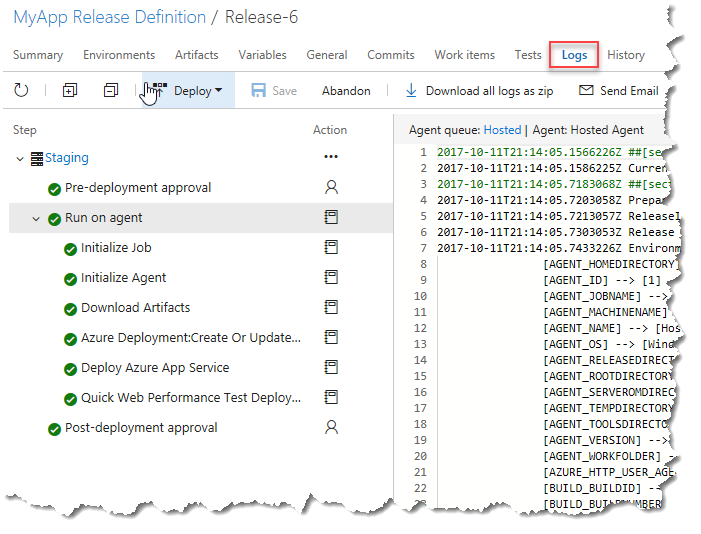
-
Select the Logs tab. Here, in the left pane you will see the status of each step as it executes. If all is well, you should see a green tick against each step as it completes. In the right pane you can see the detailed log output.
-
Assuming that the release deployed OK, test that the app runs:
- Open your web brower
- Navigate to your app URL http://mywebapp-<your initials>-staging.azurewebsites.net
- You should see your app running
We can now set the release to trigger automatically following a successful build. to do this…
-
Hover your cursor over the name of your release in the Release Definitions list in the left-hand pane, until the ‘…’ button appears. Click it and select Edit.
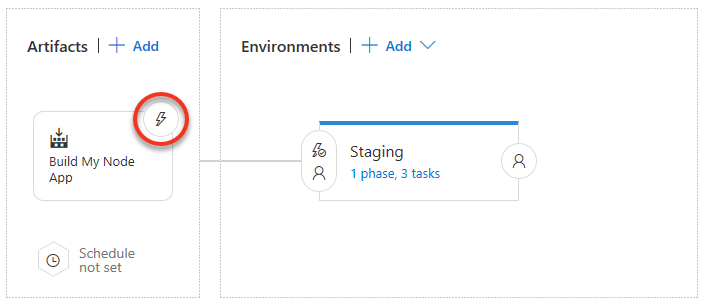
-
Click on the Continuous Deployment Trigger icon on the build artifact.
-
Click the switch to Enabled and select the master branch in the Build Branch filters.
-
Click Save
Monitoring the application
In a CI/CD lifecycle, the last stage is to obtain feedback on your application ‘running-in-the-wild’ as input into your next development cycle. This feedback can take many forms from customer surveys to automated telemetry and crash reports. Azure has lots of capabilities that support gathering this feedback such as Application Insights. Let’s setup Application Insights to monitor our new application…
-
Login to the Azure Portal at http://portal.azure.com
-
Select New > Developer Tools > Application Insights.
-
On the Application Insights blade, select the following parameters:
- Name: MyApp Application Insights
- Application Type: Node.js Application
- Subscription:
(default) - Resource Group: Select Use existing and select your MyAppRG-Staging resource group
-
Click Create.
-
Once the deployment has succeeded, go to the resource.
-
In the blade menu, scroll down to the Configure section and select Properties.
-
Copy your resource’s Instrumentation Key (also called an ikey).
Application Insights uses the ikey to identify telemetry data relating to our Azure app. To wire this up, we need to install the Application Insights npm package into our application and specify the ikey in our code.
To do this:
-
Back in VSCode, press
Ctrl-'to open a terminal window. -
Enter the following command:
npm install applicationinsights --save
-
Close the terminal window, and open the app.js file.
-
At the top of the file insert the following text, replacing <instrumentation_key> with the key you copied from the Azure Portal earlier. Tip: Since the key is in your clipboard, paste this into the file somewhere first before copying the code below:
const appInsights = require("applicationinsights");
appInsights.setup("<instrumentation_key>");
appInsights.start();
-
Press
Ctrl-Sto save the file. -
Press
Ctrl-Shift-Gto switch to the source control view. Enter the message Added Application Insights and pressCtrl-Enterto commit the changes. -
From the ‘…‘ menu, select Push to push the changes up to VSTS.
This will trigger a new build and release of your application and will take several minutes to complete. Hopefully you can remember how to track their progress in VSTS.
When the application has redeployed there should already be some telemetry available due to the execution of the Quick Performance Test. Let’s go back in to Azure and take a look.
Note. It can sometimes take a few minutes for data to appear in App Insights, so be patient, one tip is to click on Time Range and change it to ‘Last 30 minutes’
-
Go back to the Azure Portal, and re-open the Application Insights blade for your app.
-
Navigate to the Overview menu. You should see some telemetry in the Overview timeline.
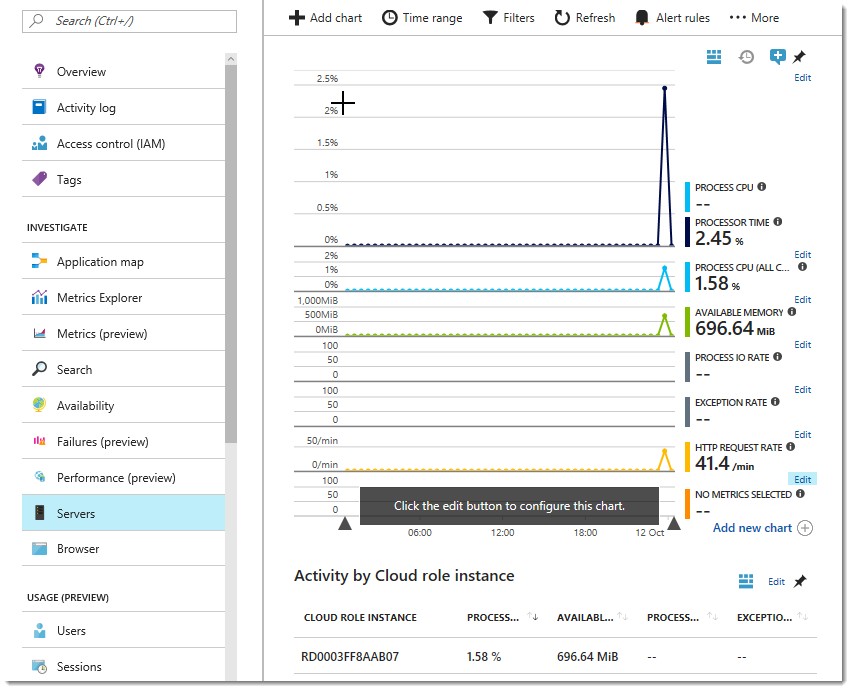
-
Select the Servers menu. Here we can see a time-phased graph of several key server metrics such as:
- Processor Time
- Process CPU
- Available Memory
- HTTP Request Rate
You can also check the Application map, Performance (preview) views to see the data coming from your app. These are just some of the large collection of available metrics, alerts and diagnostics available through Application Insights on Azure.
Congratulations. You finished the lab!
To summarise what you just did:
- You created a Node.js web application using VSCode.
- You put the application code under local source control with Git.
- You created a project in Visual Studio Team Services to manage your app development.
- You uploaded your source code to the VSTS project’s source code repository.
- You created a VSTS Build Definition to build your app and you configured it as a CI build that would be triggered automatically when new code was committed to your source code repository.
- Following an Infrastructure as Code approach, you defined the Azure resources needed to run your application in an ARM Template, which You added to source control.
- You created a release definition to automatically provision the Azure resources, deploy your application and run an automated test to ensure that it ran correctly.
- You completed our CI/CD pipeline by setting the release to trigger automatically on each successful build.
Follow-on Activities
-
How would you modify your CI/CD pipeline to deploy the app to another environment called QA prior to deploying to Staging?
-
What if, in doing (1) above, we want to have someone manually approve that the QA application is working correctly before we deploy into the Staging environment. Can you find where and how we would do this?
-
What features in the Azure App Service allow us to easily move our application from Staging to Production?
Leave a comment