
Introduction
Those of you using the site know that we are big fans of vscode and running WSL on Windows. We have a strong focus on open source software here and appreciate the direction the product groups are taking in terms of open source support on Windows 10.
We have been using WSL2 for a long time, putting up with the frequent OS updates on the Insiders fast ring purely to get the benefit. (Thank goodness for the shift to the slow ring late last year.)
WSL1 was a major innovation, but it was limited for development as the filesystem was slow and it did not have full system call compatibility. WSL2 addressed that by including the full Linux kernel in a lightweight VM. They have worked some serious magic here, with usual startup time under a second.
WSL2 was prominent at Microsoft Build along with some of the other tooling included in this post such as Windows Terminal which has also gone GA. (If you missed Scott Henselman’s keynote then that is recommended.) This post will use winget to install Windows Terminal, and then add in a few customisations. And we’ll also configure both Visual Studio Code and Docker Desktop to use WSL2 as the backend.
Right, let’s get on with it!
WSL2
Update to WSL2
- Update to Windows 10, version 2004 (build 19041)
- Enable WSL2
-
Download a distro from the Windows Store
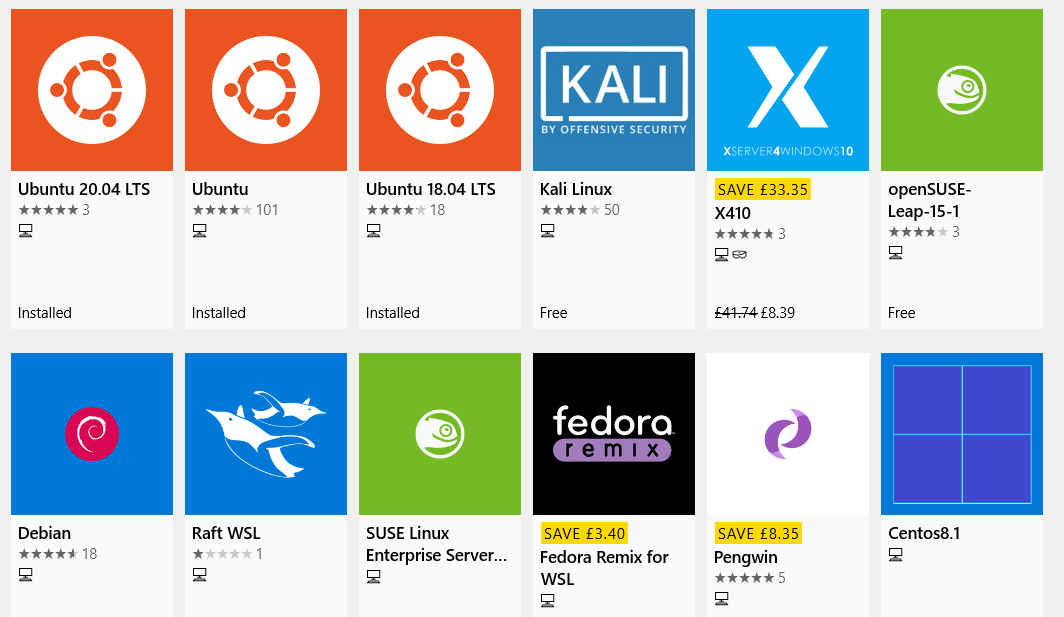
If you are downloading a new distro from the Windows Store and you don’t have a preference then I would recommend Ubuntu 20.04. This post will assume Ubuntu from this point; if you have chosen another flavour of Linux then substitute it in.
Here are a few recommended updates for initial config, assuming your distro is Ubuntu 20.04:
-
Update the OS
sudo apt update && sudo apt full-upgrade -y -
Install git
sudo apt install gitNeeded by vscode for source control when using Remote-WSL
-
Install Azure CLI
curl -sL https://aka.ms/InstallAzureCLIDeb | sudo bashFrom https://docs.microsoft.com/cli/azure/install-azure-cli-apt
Windows Terminal
You could download Windows Terminal from the store, but where’s the fun in that. Let’s use the new winget package manager instead.
- Open either Command Prompt or PowerShell
-
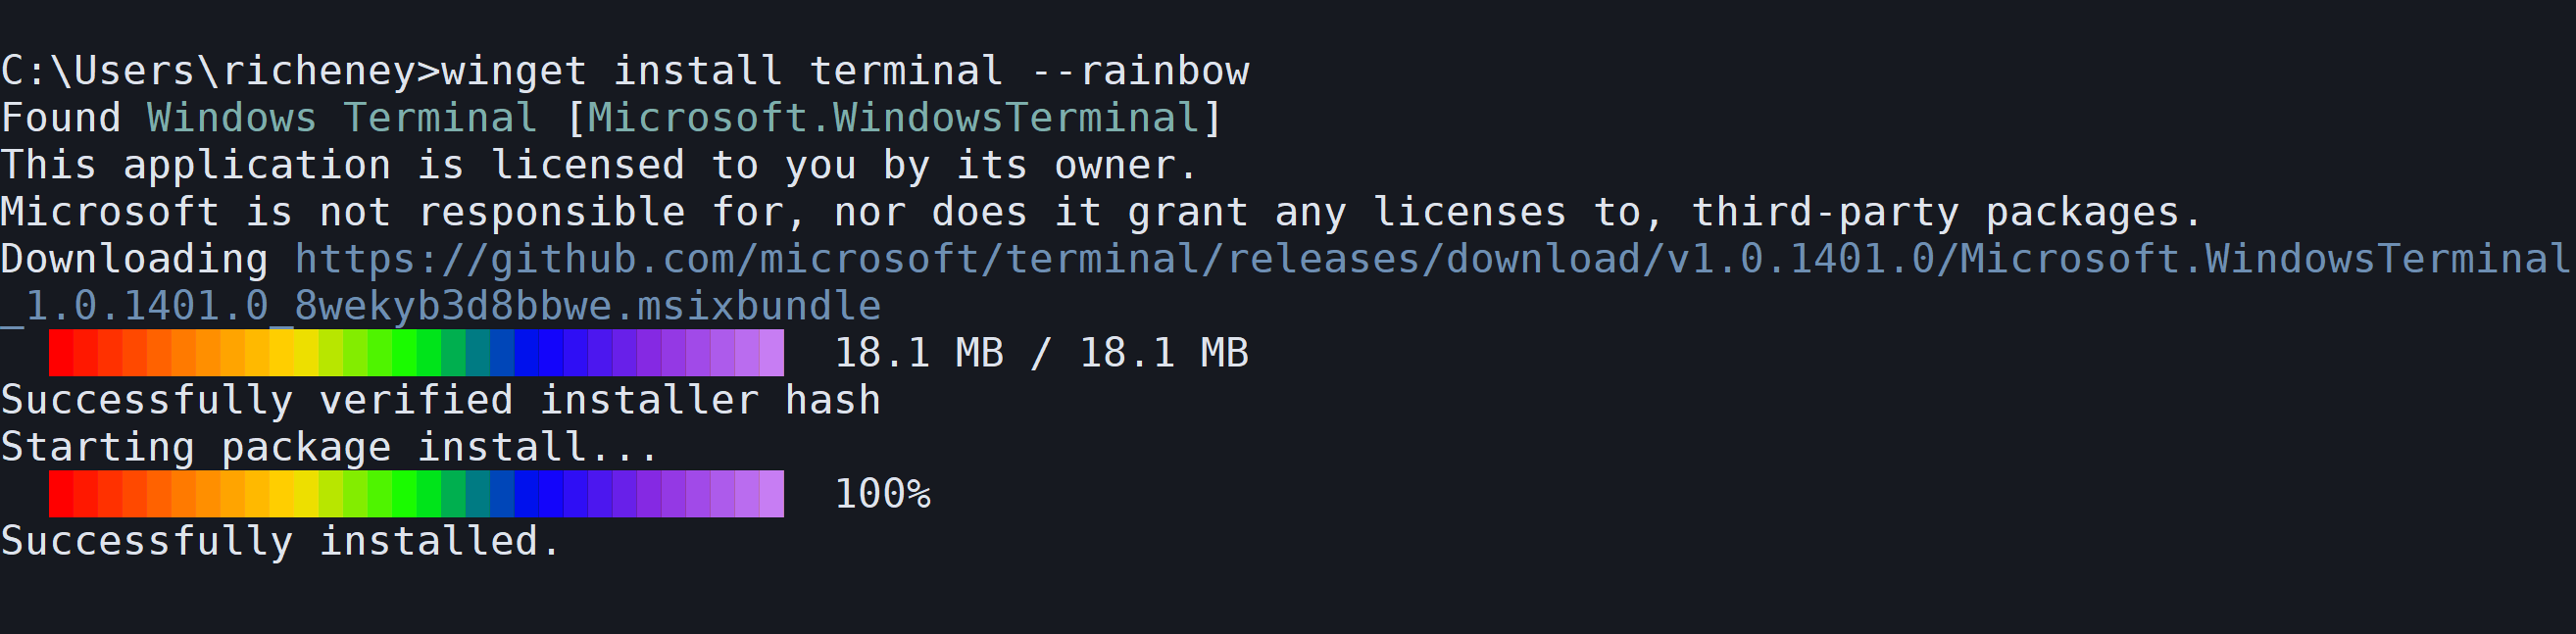
Install Windows Terminal
winget install terminal --rainbowExample:
Once it is downloaded then you can close Command Prompt and open Windows Terminal instead.
-
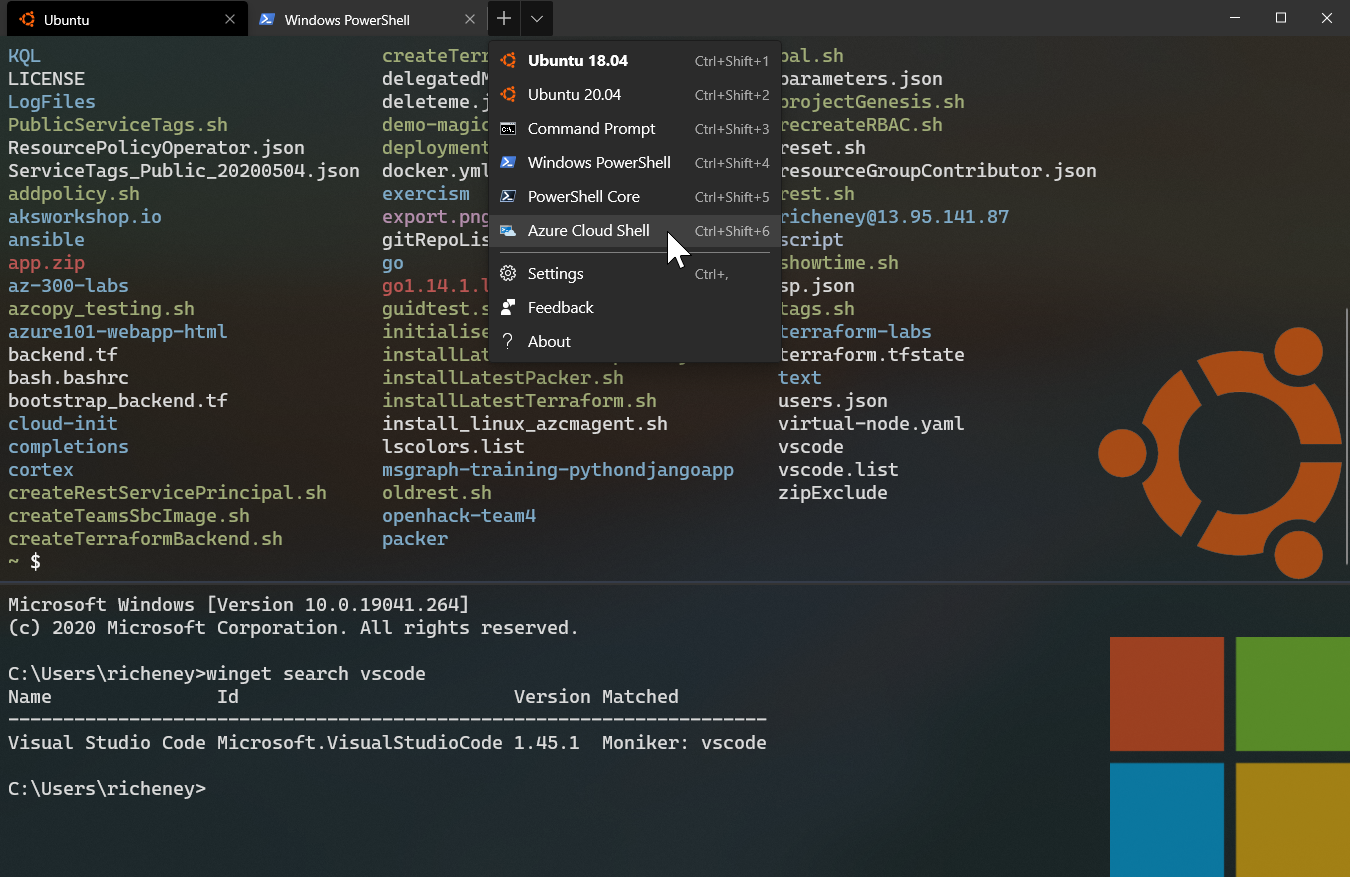
Check the drop down next to the default tab and you’ll see it has auto-detected Windows PowerShell, Command Prompt, Azure Cloud Shell, plus anything else you have installed such as your WSL Linux distributions and PowerShell Core:
It supports multiple tabs and multiple panes, full characters sets etc.
If you are spending a lot of time in the CLI then your Windows Terminal probably deserves a little customisation, which is covered in the last section of this post.
Visual Studio Code and the Remote Development extension pack
You could browse to the vscode download page and then follow the install extensions to install the Remote Development extension pack, but for speed and brevity here are the PowerShell or Command Prompt commands:
-
Open Command Prompt or PowerShell
Windows Terminal is assumed for all CLI use from this point!
-
Install Visual Studio Code
winget install vscode --rainbow -
Install Remote Development extension pack
code --install-extension ms-vscode-remote.vscode-remote-extensionpack
Opening vscode from WSL2
My favourite way to open vscode is directly from Windows Terminal.
- Open Ubuntu
-
Change to your desired working directory, e.g.
cd /git/my-repo -
Open vscode
code .This makes use of the magical integration between WSL and Windows 10 to open the application at the OS level. Note the
>< WSL: Ubuntuat the bottom left, denoting Remote-WSL use and the distro. You can also remote via SSH, into local Containers, or the hosted containers called CodeSpaces. Check out the extensions - Open the integrated terminal using
CTRL+' -
Run
lsb_release -ato show the Ubuntu version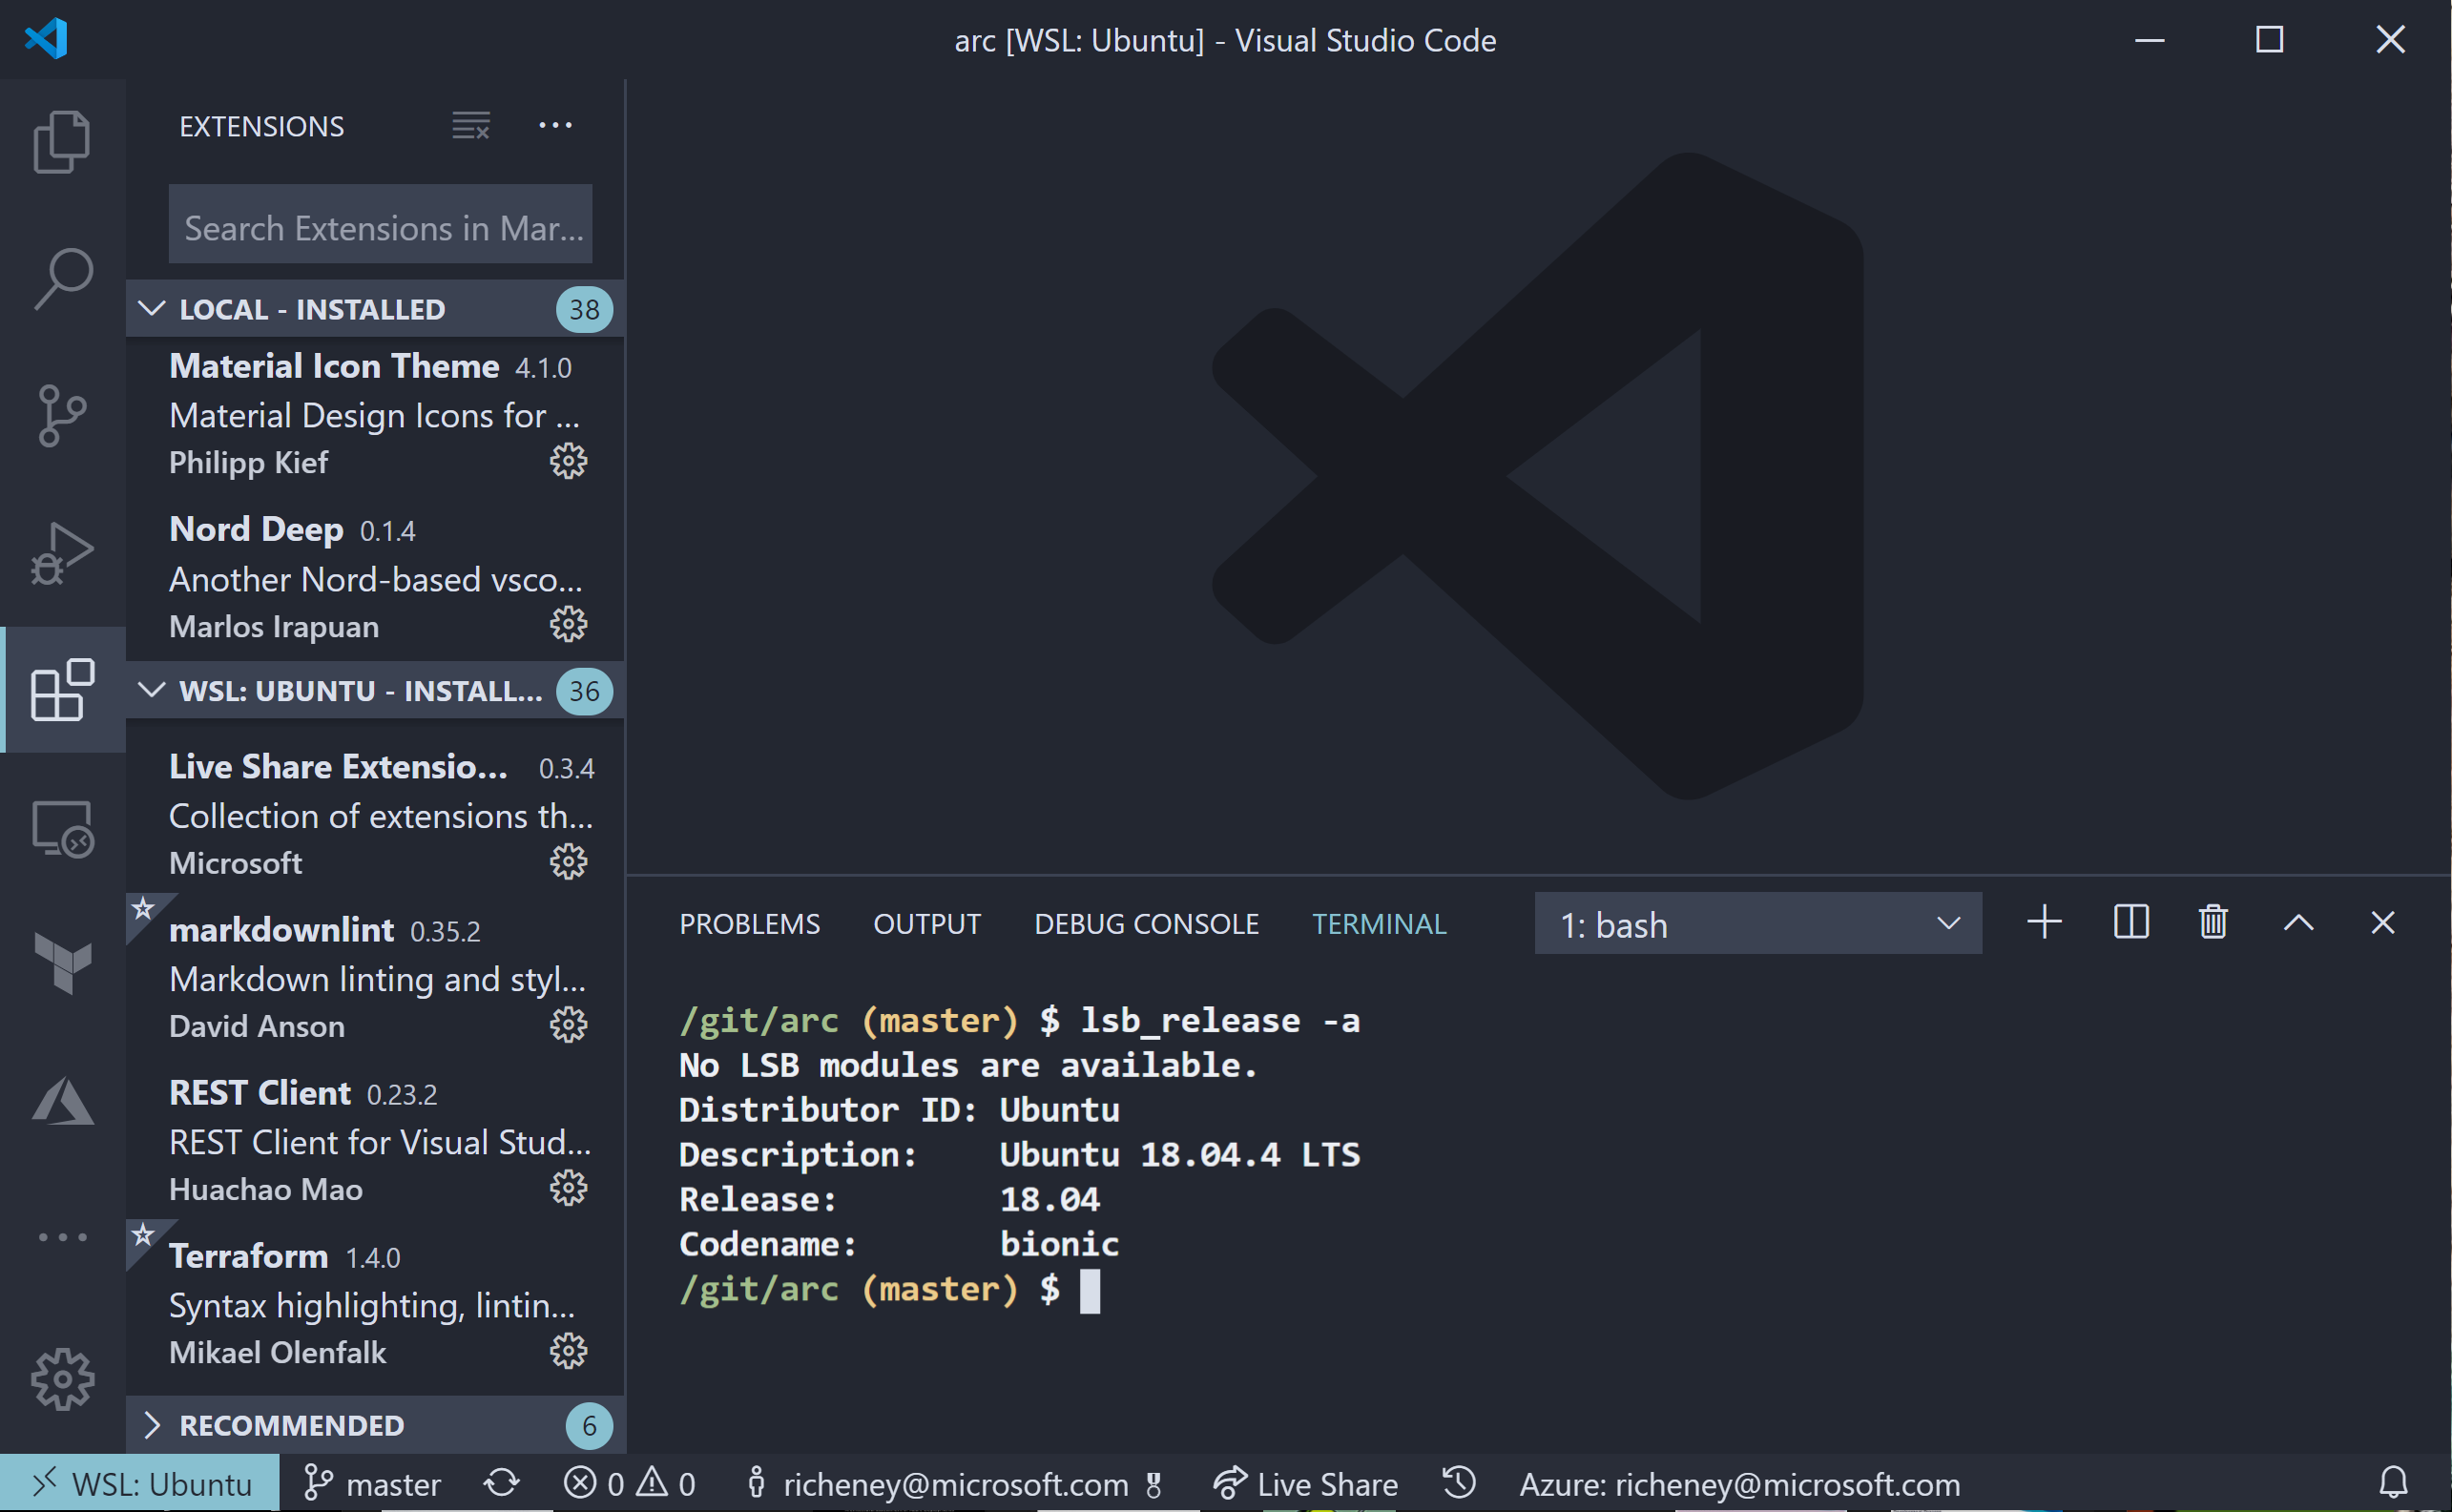
You are now running the vscode-server backend process in WSL2.
Top tips:
- Use the local filesystem spaces in preference to anything within /mnt/c as it will run significantly faster
-
Go to
\\wsl$\Ubuntuin File Explorer, e.g.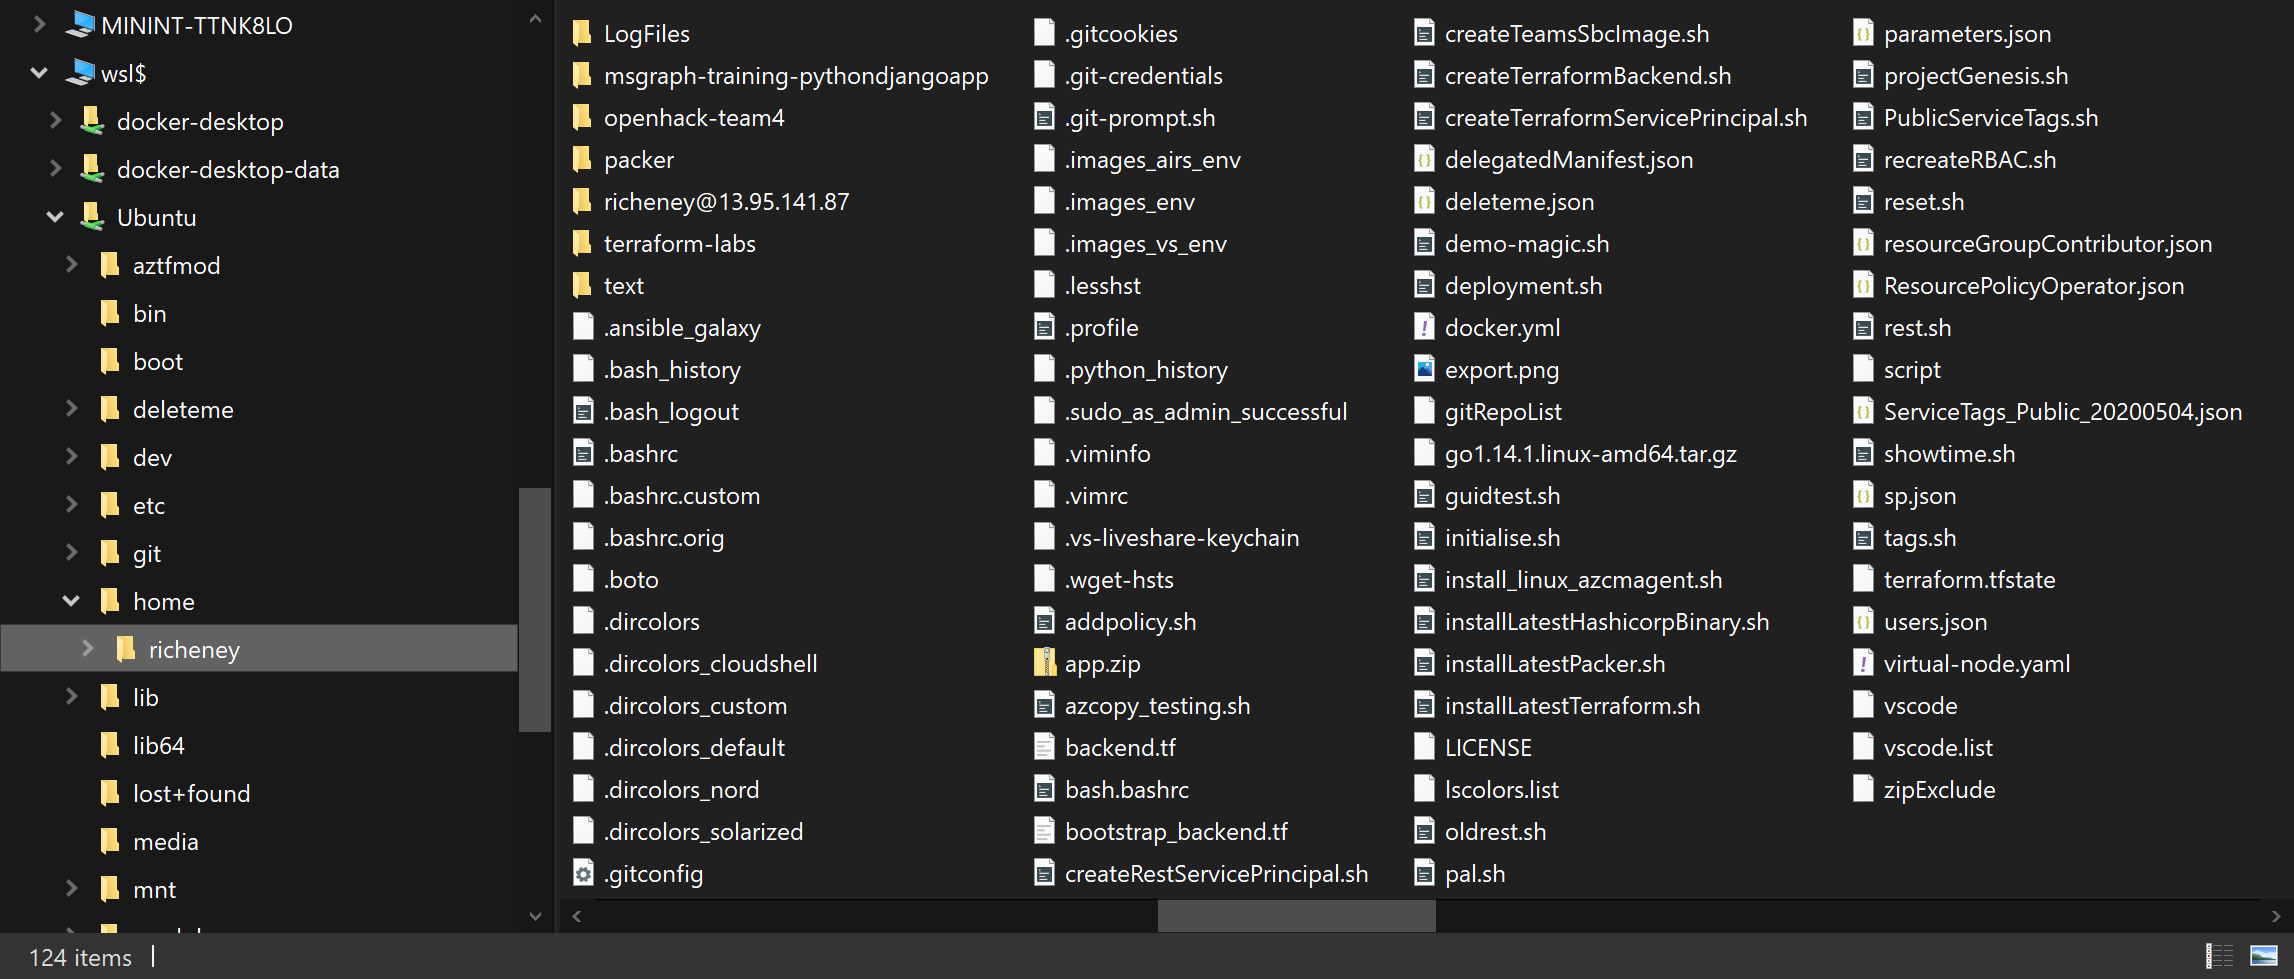
Change Ubuntu to the name of your distro from
wsl -l -vYou can drag and drop files between Windows and Linux filesystems and it seems to handle the EOL conversion nicely.
Docker
Running linux Docker containers on Windows using Docker Desktop has traditionally used a full VM on the Hyper-V subsystem. It has been completely separate from anything with WSL. Docker Desktop will now use the WSL2 backend as the default backend on systems that support WSL2. It is a lot quicker and reduces Docker Desktop’s memory usage.
Docker Desktop runs in the systray. Hover over the icon to see the status in the tooltip, and right click for the context menu for settings, restart, learn etc.
- Install Docker Desktop
- You will need to be running the session as Administrator. (Start -> “Terminal” -> Right Click -> Run As Administrator)
winget install DockerDesktop- Enable WSL2 Windows Features should now be checked by default in the dialog box
- Close the Installation succeeded dialog box once deployed
- Start Docker Desktop (from the Start Menu)
- Wait for the systray icon to move from “Docker is starting” to “Docker Desktop is running”
- Skip the Get Started with Docker tutorial
- You can always restart the tutorial via Learn on the context menu
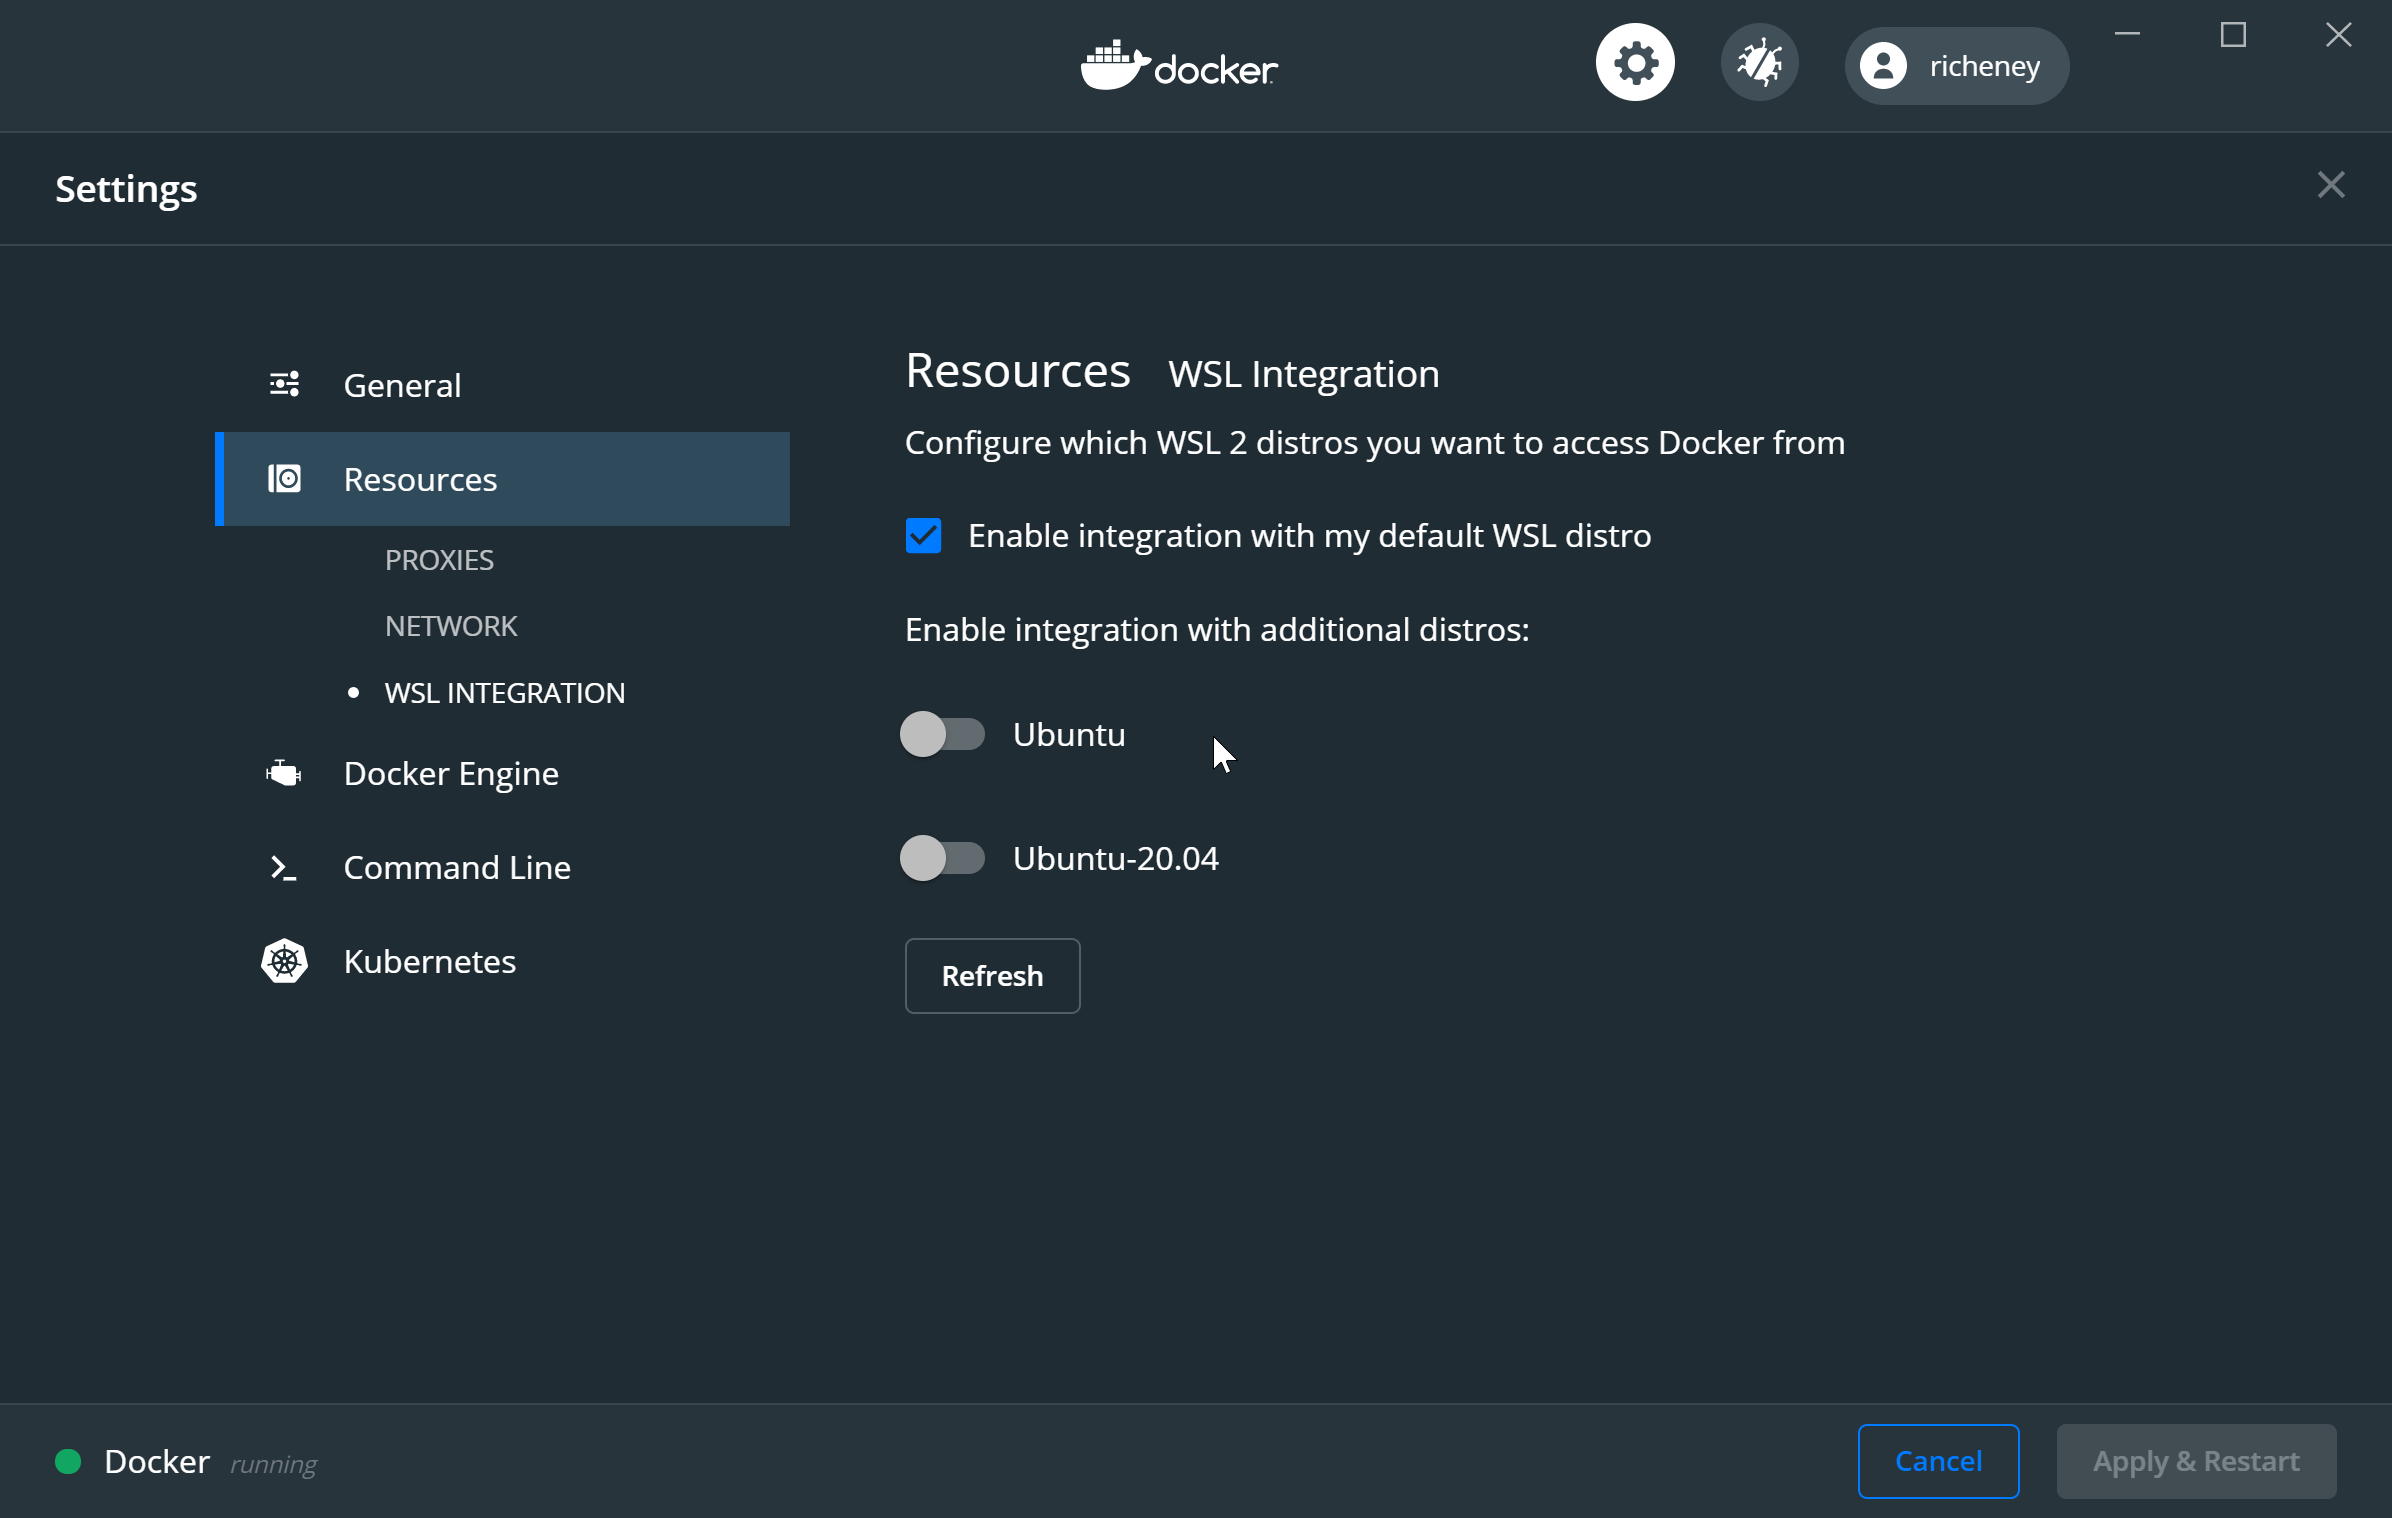
- Click on Settings
- General: Use the WSL2 based engine is checked
- Resources; WSL Integration: Your default distro should be checked and you can add others
-
Open Command Prompt
docker run -dp 80:80 docker/getting-started -
Open a browser and go to http://localhost:80
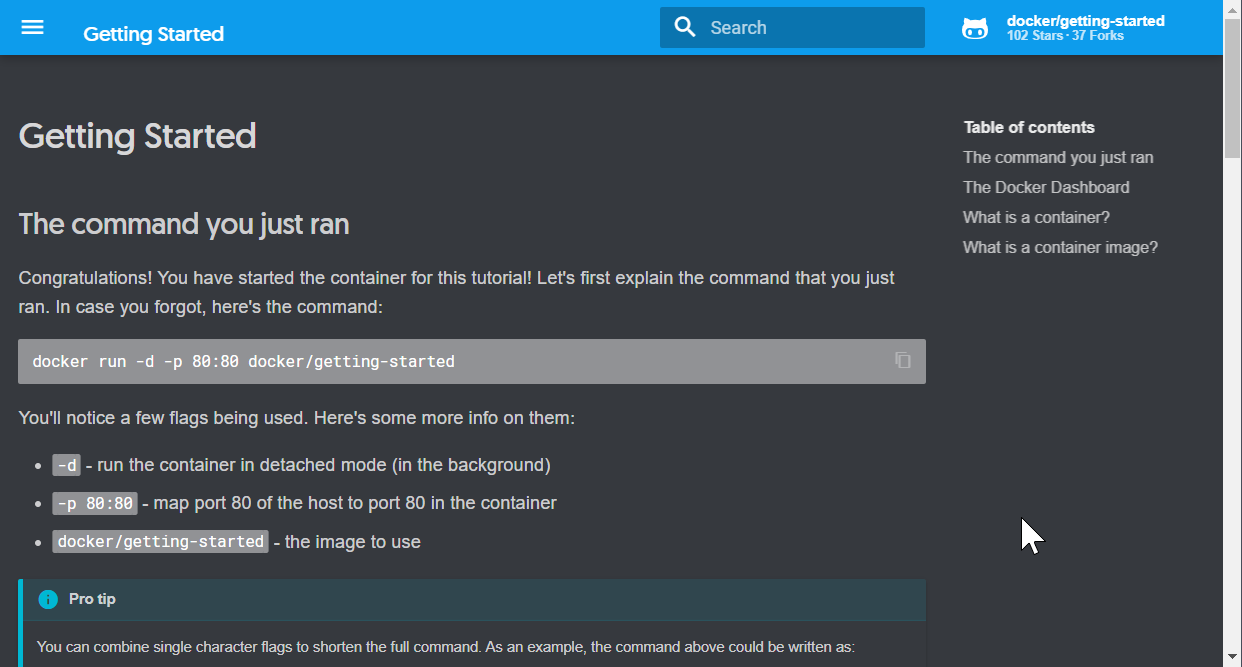
The container is running.
-
Open Ubuntu
- Check the container is running within WSL2
docker psExample output:
  CONTAINER ID        IMAGE                    COMMAND                  CREATED             STATUS              PORTS                NAMES
  b005a3a10b28        docker/getting-started   "nginx -g 'daemon of…"   5 minutes ago       Up 5 minutes        0.0.0.0:80->80/tcp   priceless_dirac
OK, it is working. If you want to look at using Visual Studio Code with containers as a next step, then start here.
Customising Windows Terminal
Windows Terminal is hugely customisable. See https://aka.ms/terminal-docs for full info. There is a setting UI coming in a future version of Terminal, but in the meantime we’ll customise the settings.json. (It is recommended to associate JSON files with vscode rather than Notepad.) Note that there is a read only system level settings file and then your settings.json overrides or extends the config.
If you are in Windows Terminal then CTRL+, will open the settings.
There are four sections:
I’ll give an example or two from each from my settings.json. It is entirely up to you whether you want to add them to your personal settings.json file.
I’ll start at the bottom.
Key Bindings
There are a huge number of default keyboard shortcuts, but much like vscode there is massive scope to customise.
- Scroll to the
"keybindings": []array -
Paste in the following between the square braces
{ "command": "closePane", "keys": [ "ctrl+w" ] }, { "command": { "action": "splitPane", "split": "horizontal" }, "keys": [ "ctrl+shift+-" ] }, { "command": { "action": "splitPane", "split": "vertical" }, "keys": [ "ctrl+shift+=" ] }, { "command": { "action": "splitPane", "split": "horizontal", "profile": "Command Prompt" }, "keys": "ctrl+shift+d" } - Press
ALT+SHIFT+Fto auto-format the file
The first three bindings override existing keyboard shortcuts. The last one is a new custom rule based on Kayla Cinnamon’s config.
Colour Schemes
Almost mandatory for WSL2’s default colour scheme…
- Scroll to the
"schemes": []array -
Paste the following between the square braces
{ "background": "#000000", "black": "#151515", "blue": "#6A8799", "brightBlack": "#636363", "brightBlue": "#7EAAC7", "brightCyan": "#ACBBD0", "brightGreen": "#A0AC77", "brightPurple": "#B48EAD", "brightRed": "#BC5653", "brightWhite": "#F7F7F7", "brightYellow": "#EBC17A", "cyan": "#C9DFFF", "foreground": "#D9D9D9", "green": "#909D63", "name": "Relaxed", "purple": "#B06698", "red": "#BC5653", "white": "#D9D9D9", "yellow": "#EBC17A" } - Press
ALT+SHIFT+Fto auto-format the file
You can find lots of examples of colour schemes. Visual Studio Code will realise they are hex colour values and display the colour. Hover over a hex code and the colour picker will be displayed.
Profile Settings
The profiles section has a defaults object and a list array containing the individual profiles.
Most of my config is in the default section to standardise across all of them:
"defaults": {
    "backgroundImageOpacity": 0.5,
    "backgroundImageStretchMode": "none",
    "fontFace": "Cascadia Code",
    "acrylicOpacity": 0.8,
    "cursorColor": "#FFFFFF",
    "cursorHeight": 25,
    "cursorShape": "vintage",
    "fontSize": 14,
    "colorScheme": "Relaxed",
    "useAcrylic": true,
    "closeOnExit": true
}
All of these can be overridden per profile in the list. Here are some additional settings I have within my default Ubuntu profile:
{
    "guid": "{2c4de342-38b7-51cf-b940-2309a097f518}",
    "backgroundImage": "%USERPROFILE%/OneDrive/terminal/OS_Ubuntu.png",
    "backgroundImageAlignment": "bottomRight",
    "commandline": "wsl.exe ~",
    "icon": "%USERPROFILE%/OneDrive/terminal/ubuntu.png",
    "name": "Ubuntu 18.04",
    "tabTitle": "Ubuntu",
    "source": "Windows.Terminal.Wsl",
    "hidden": false
},
The commandline has been configured to go straight to the home directory.
You can use custom images for your icons and backgrounds. I have a small logo for Ubuntu or Microsoft at the bottom right. Animated gifs are supported if you want to go mad. I created a terminal folder within my personal OneDrive and placed the images there.
Another alternative is to use the roaming profile folder for the UWP app. It is more of a pain to find, but will work across your machines. Amusingly it is easiest to get there from within WSL2.
-
In Ubuntu
(cd /mnt/c/Users/richeney/AppData/Local/Packages/Microsoft.WindowsTerminal_*/RoamingState && explorer.exe .)This creates a sub shell in Bash, moves to the right directory and then triggers File Explorer.
-
Put the files in that folder and you can then use the following pathing format in the profile:
"backgroundImage": "ms-appdata:///roaming/myImage.png"
Global Settings
The global settings are at the top of the file. They are for the global application level settings such as theme, tabs, initial size etc. The most important one is the defaultProfile. If you want to change it from PowerShell to one of your WSL distros then copy the GUID from the list and set it here.
    "defaultProfile": "{2c4de342-38b7-51cf-b940-2309a097f518}",
    "initialCols": 120,
    "initialRows": 30,
    "copyOnSelect": false,
Finishing up
This took longer than I thought to write up, but I know there will be a lot of interest in setting up Windows 10 for OSS development.
We use these tools every day when automating on Azure and it makes it an absolute pleasure. Enjoy!
Leave a comment