
Introduction
All organizations should have a monitoring strategy but ensuring that monitoring is actually set up correctly in an ever-changing environment can be tricky task. In this lab we’ll make sure resources are set up to use Azure Monitor automatically.
Initiatives
An initiative is basically a collection of policy definitions that are tailored towards achieving a singular overarching goal, i.e. Deploy Azure Monitor for Virtual Machines. They were initially called policy sets, and you will see that naming in some of the CLI commands or REST calls.
Our recommendation would be to always assign initiatives, even if it contains only one policy. If you modify that initiative, adding, removing or modifying the constituent policies, then they will be auto-assigned to the correct scope.
Assigning initiatives
- Azure Monitor relies on log analytics to store all its data, so first we need a create a Log Analytics workspace if you don’t have one.
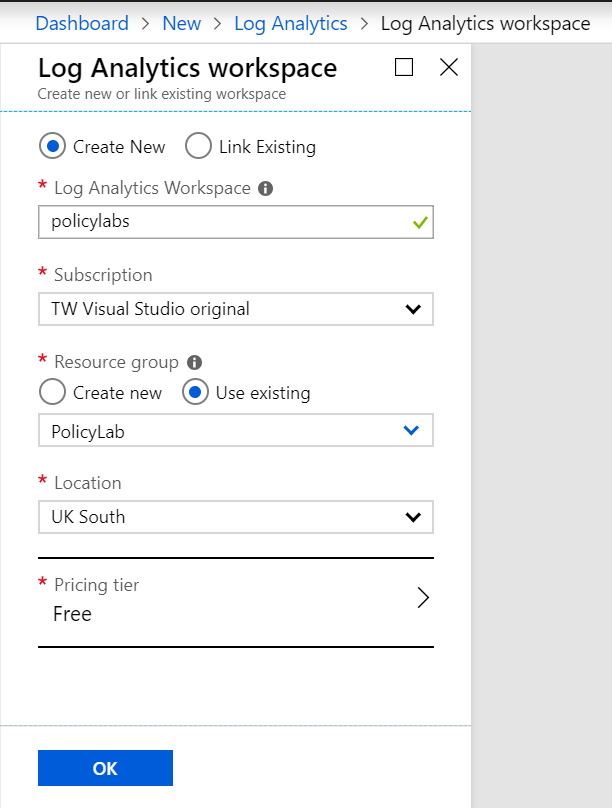 Figure 1: Create Log Analytics Workspace
- There are various agents that need to be installed on Windows and Linux to get the full functionality of Azure Monitor, you can read about them here.
Handily Azure Policy already has an initiative which contains the relevant definitions each deploying an agent. Navigate to Definitions in Azure Policy, set the definition type to Initiative and open “Enable Azure Monitor for VMs”
Notice the definitions do not have a “deny” effect type like labs 1 and 2, we have DeployIfNotExists and AuditIfNotExists. Explore each definition and click Assign.
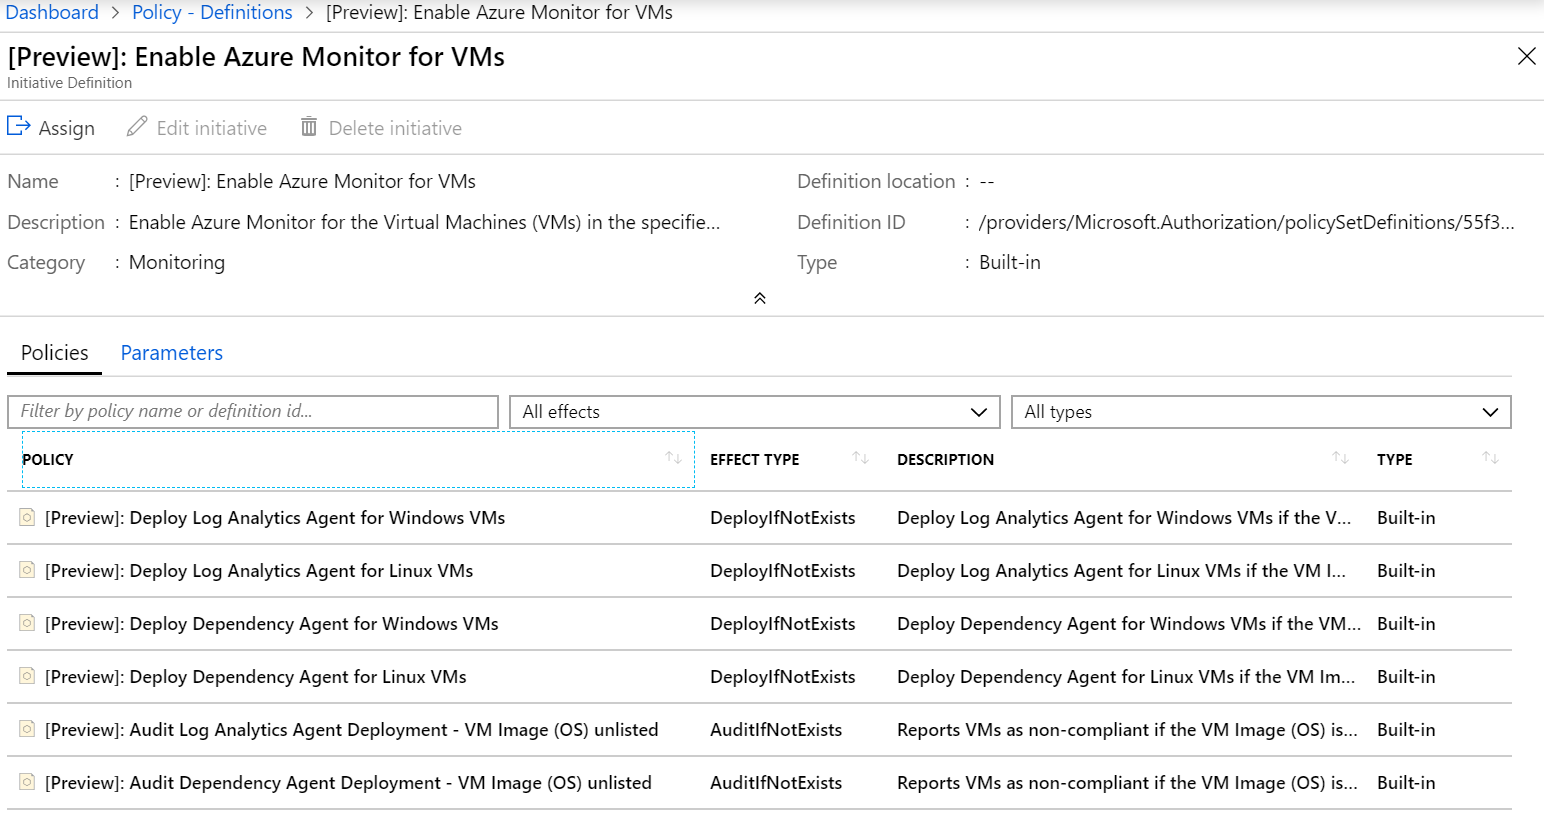 Figure 2: Enable Azure Monitor for VMs initiative
- Keep the same scope as the previous labs, Subscription/PolicyLab and choose the Log Analytics workspace you just created.
The optional parameters are if you had your own Windows/Linux images (that support the agents), you could add them to the scope of this initiative.
Under Managed Identity, you can see the check box is selected, this is because the initiative being assigned includes a policy with the deployIfNotExists effect. A Managed Identity is required because permissions will be needed to deploy the agents to the virtual machines and instead of adding a username and password, Azure will manage this for you. See here for more details on Managed Identities.
Click Assign.
Testing
- Let’s deploy some VMs using Azure CLI to test.
# Deploy UbuntuLTS VM
az vm create -n Lab3UbuntuLTS -g PolicyLab --image UbuntuLTS --admin-username policyuser --size Standard_D2s_v3 --no-wait

# Deploy Windows 2016 VM
az vm create -n Lab3Windows2016 -g PolicyLab --image Win2016Datacenter --admin-username policyuser --size Standard_D2s_v3 --no-wait
That takes care of deploying VMs that support the agents, let’s deploy a VM that can’t yet.
# Deploy Core VM
az vm create -n Lab3Core -g PolicyLab --image CoreOS --admin-username policyuser --size Standard_D2s_v3 --no-wait
Now go and have a cup of tea, seriously, because Azure Policy is not instant. It can take 30mins or more to finish evaluating/installing/etc.
-
After a while Azure Policy will have finished evaluating the VMs and installing the agents where possible. Open Compliance in Azure Policy, set the scope to be Subscription/PolicyLab, you can also do this by opening “Policies” directly from your resource group. You should see we have compliant and non-compliant resources and all your policies/initiatives assigned.
-
Open up the “Enable Azure Monitor for VMs” initiative and open the policy definitions for more details.
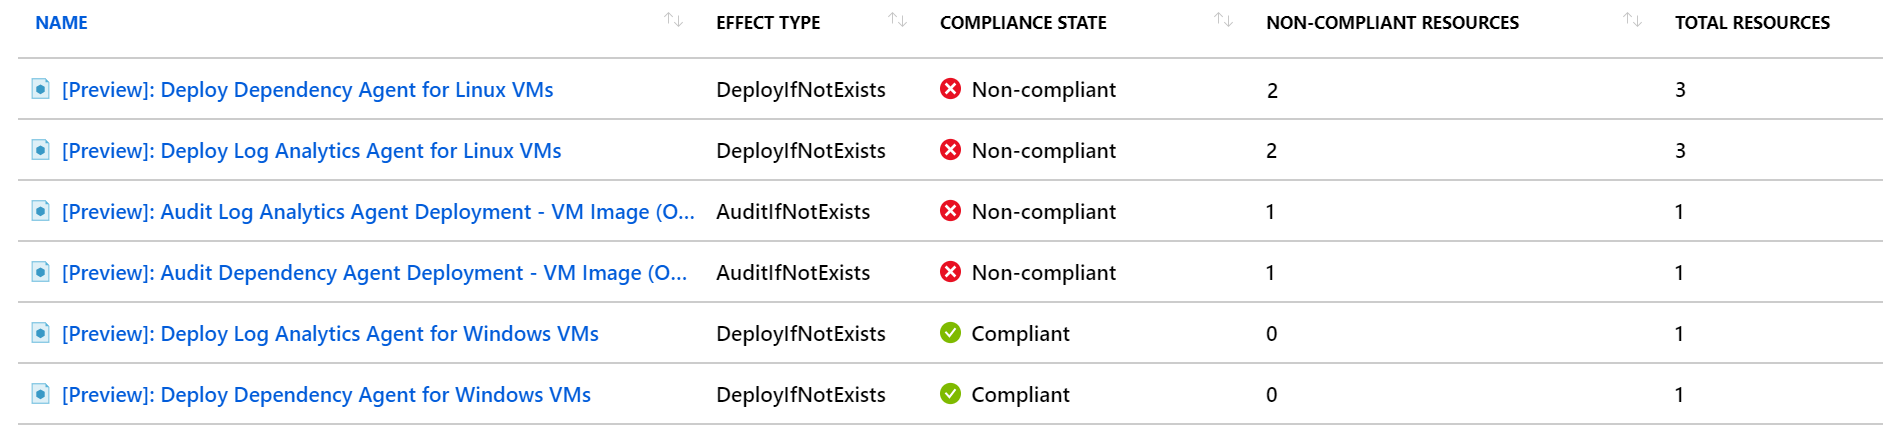 Figure 4: View Azure Monitor for VMs initiative
You should see the policies for log analytics and dependency agents on Windows VMs as compliant, that’s Azure Monitor enabled automatically for the VM Lab3Windows2016. The policies with unsupported images will show Lab3Core as it’s running an OS that doesn’t support Azure Monitor. The policies for linux will show some VMs as compliant and some as not compliant. This is because the VM Lab3UbuntuLTS automatically got the agent but the VMs deployed before the policy was applied didn’t.
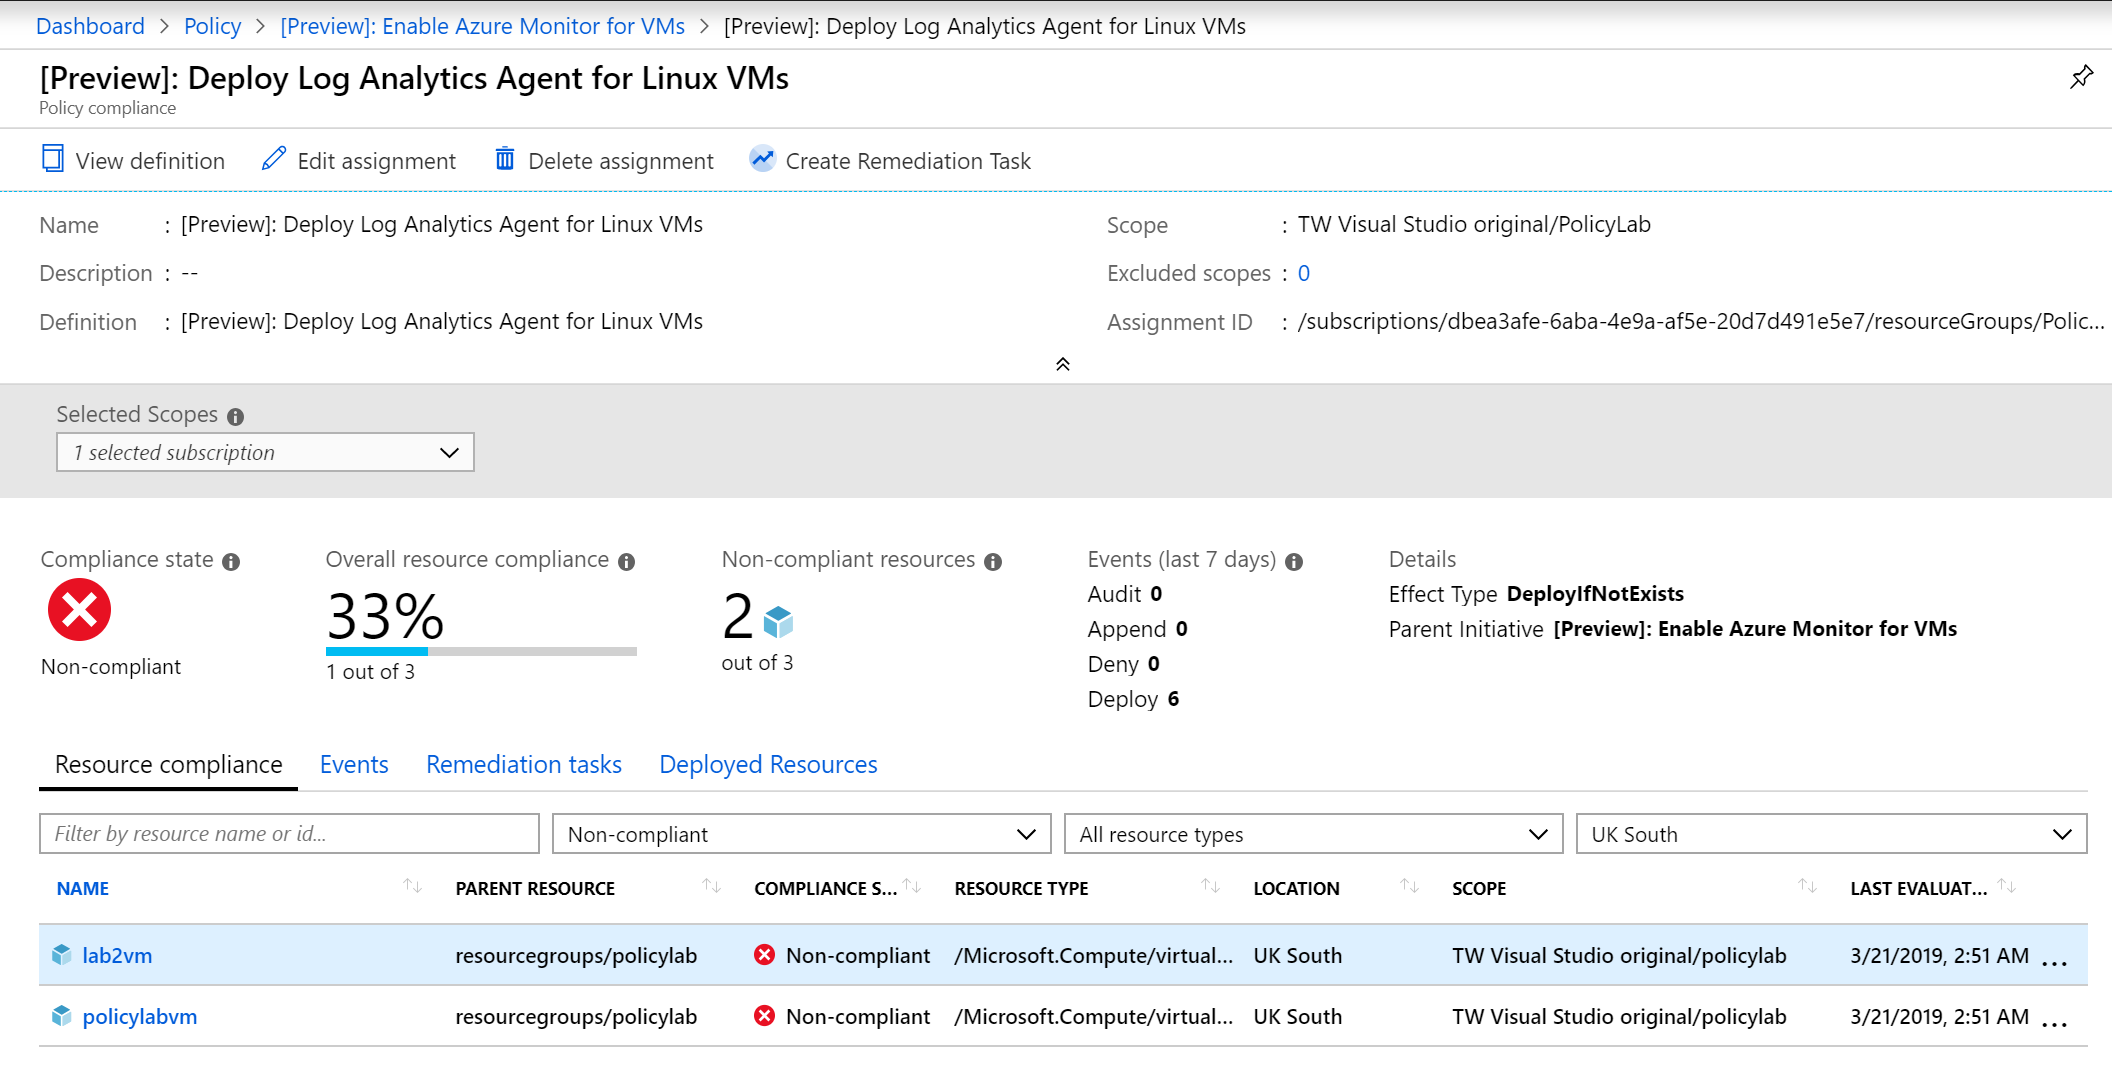 Figure 5: View Log Analytics for Linux policy
Remediation
- Click create remediation task and then click remediate.
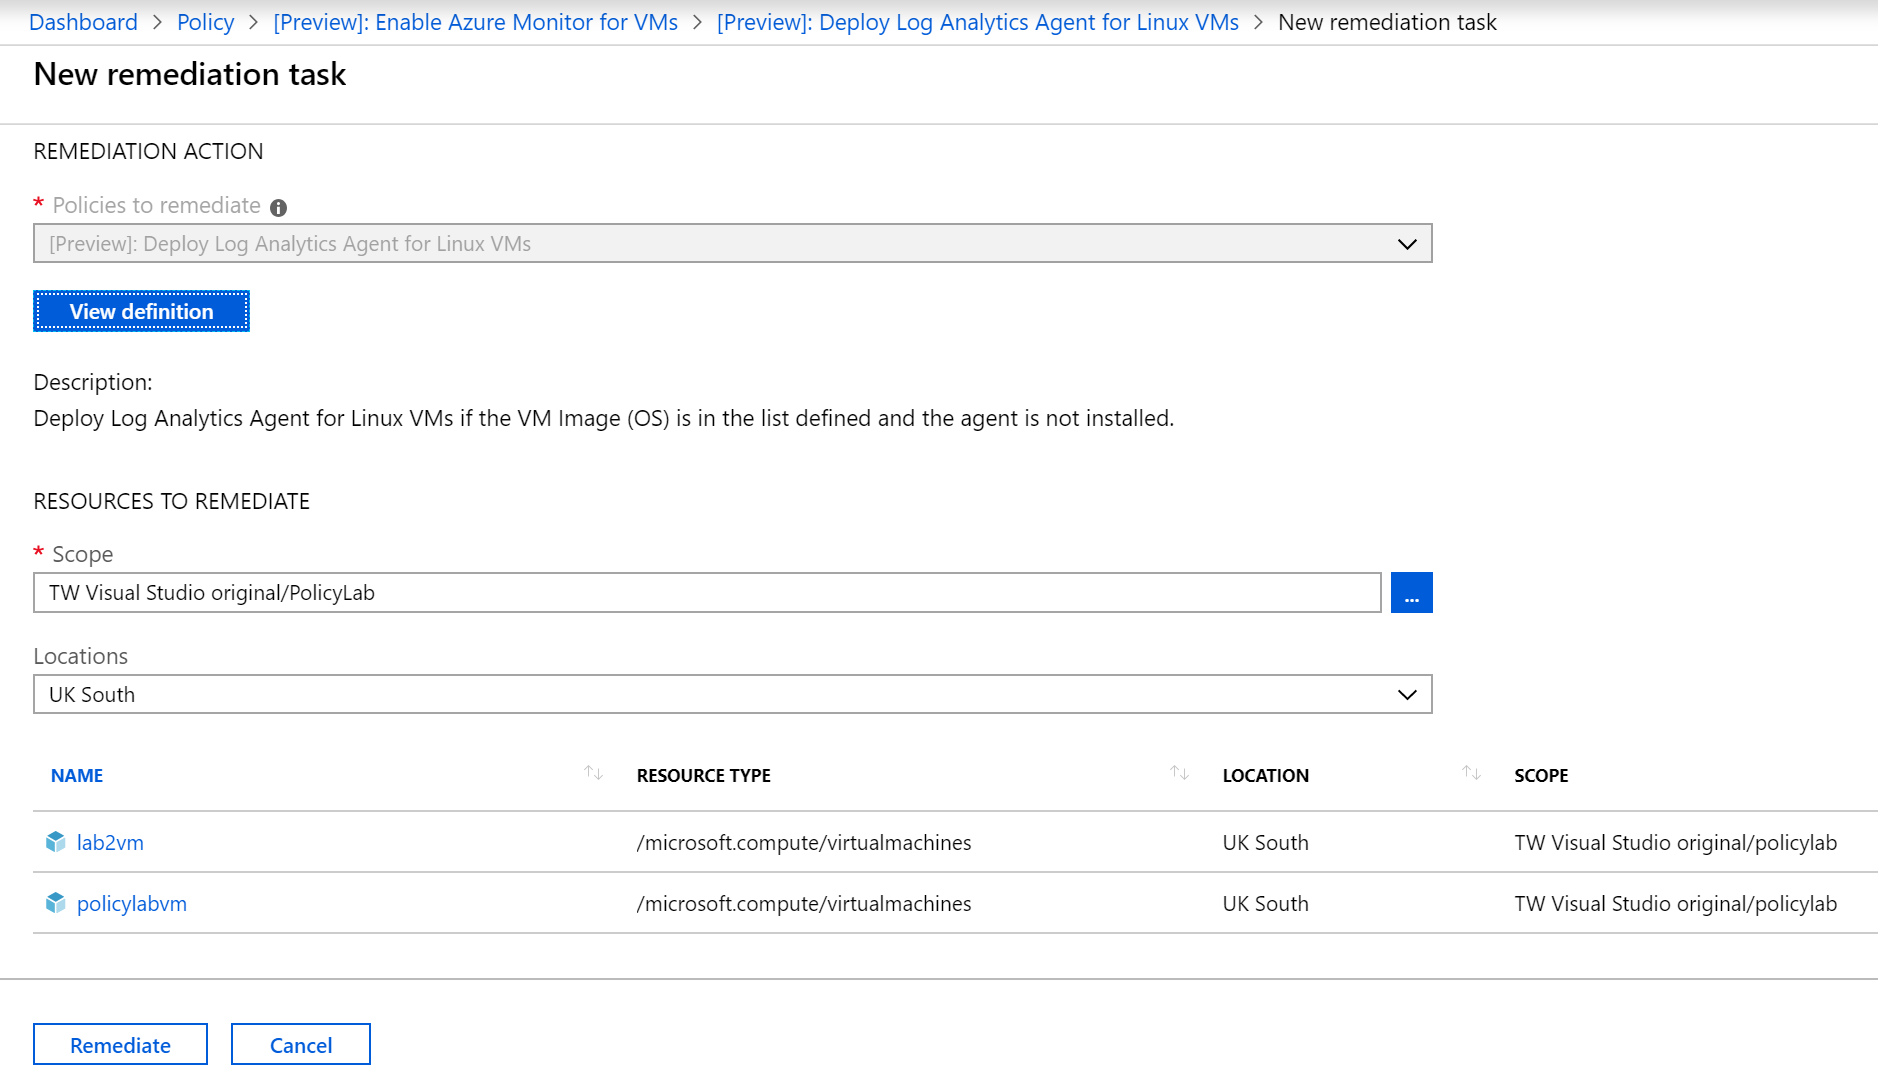 Figure 6: New remediation task
Repeat this for both linux policies.
 Figure 7: Remediating in progress
- After the tasks have completed you can validate the agents have all been installed.
az vm extension list -g PolicyLab --vm-name PolicyLabVM -o table

az vm extension list -g PolicyLab --vm-name Lab2VM -o table

az vm extension list -g PolicyLab --vm-name Lab3UbuntuLTS -o table

az vm extension list -g PolicyLab --vm-name Lab3Windows2016 -o table

az vm extension list -g PolicyLab --vm-name Lab3Core -o table
You should see the MMAExtension and DependencyAgent extensions have been installed on all VMs apart from Lab3Core.
Finishing up
That concludes this lab, where we’ve learnt how to use a policy initiative to automatically deploy the Azure Monitor agents for new VMs and remediated existing VMs.
Keep the PolicyLab resource group but you can delete all the VMs.
az vm delete --ids $(az vm list -g MyResourceGroup --query "[].id" -o tsv)
Next we’ll create some policies to ensure a resource naming policy
Leave a comment