
Introduction
These labs have been updated soon for 0.12 compliant HCL. If you were working through the original set of labs then go to Terraform on Azure - Pre 0.12.
In this lab we’ll continue to use the Cloud Shell. As you move through the lab you will start to make use of variables and multiple .tf files. We’ll modify existing resources and add new resources and new providers.
Create the terraform-lab2 resource group and storage account
Let’s quickly recreate the storage account in a new resource group. You should be in your ~/terraform-labs folder. If you cat main.tf then it should look like the following (with a different storage account name).
provider "azurerm" {
  version = "~> 1.42.0"
}

resource "azurerm_resource_group" "lab1" {
  name     = "terraform-lab1"
  location = "West Europe"
  tags = {
    environment = "training"
  }
}

resource "azurerm_storage_account" "lab1sa" {
  name                      = "richeneyterraformlab1"
  resource_group_name       =  azurerm_resource_group.lab1.name
  location                  =  azurerm_resource_group.lab1.location
  account_kind              = "StorageV2"
  account_tier              = "Standard"
  account_replication_type  = "LRS"
  access_tier               = "Cool"
}
Update to lab2
- Restart vscode (
code .), refresh the Files pane and reselect main.tf - Change the Terraform resource ID (and name) for the resource group from lab1 to lab2
- For speed, use the Replace (
CTRL+H), add lab1 and lab2 in the boxes and then useCTRL+ALT+Enter - To find the command shortcuts you can click on the ellipsis (
...) and search in the Command Palette (F1)
- For speed, use the Replace (
-
Save (
CTRL+S)Your main.tf should now look similar to the code block below:
 provider "azurerm" {
   version = "~> 1.42.0"
 }

 resource "azurerm_resource_group" "lab2" {
   name     = "terraform-lab2"
   location = "West Europe"
   tags = {
     environment = "training"
   }
 }

 resource "azurerm_storage_account" "lab2sa" {
   name                      = "richeneyterraformlab2"
   resource_group_name       =  azurerm_resource_group.lab2.name
   location                  =  azurerm_resource_group.lab2.location
   account_kind              = "StorageV2"
   account_tier              = "Standard"
   account_replication_type  = "LRS"
   access_tier               = "Cool"
 }
Again, your storage account name should be different to the one in the example.
-
You can now run through the terraform init, plan and apply workflow at the CLI
```bash terraform init terraform plan terraform Check it exists:
1.
az resource list -g terraform-lab2 -o table
Name                   ResourceGroup    Location    Type                               Status
---------------------  ---------------  ----------  ---------------------------------  --------
richeneyterraformlab2  terraform-lab2   westeurope  Microsoft.Storage/storageAccounts
Introducing variables
Terraform allows you to use multiple .tf files. The terraform commands will effectively merge all of the *.tf files in the current working directory. (Note that by design it does not recursively move through sub-directories.)
So let’s create a variables.tf file in the citadel directory and define some of the key variables in there.
- Create a variables.tf file (
touch variables.tf)- Precreating the files with the .tf extension triggers the Terraform linting, i.e. the colour coding for the HCL syntax
- Paste in the following:
variable "rg" {
    default = "terraform-lab2"
}

variable "loc" {
    default = "West Europe"
}

variable "tags" {
    type = "map"
    default = {
        environment = "training"
        source      = "citadel"
    }
}
Browse to the https://aka.ms/terraform/docs area, and navigate to the variables section. You’ll see that there are different ways to define the variables. There are three types of valid variables, which are string, list or map.
💬 Note. If you are familiar with ARM template then the Terraform variables are roughly synonymous with the parameters in ARM templates, and are used to declare what the user can specify. They can also be used to define variables that can be used globally by all *.tf files in the current working directory (cwd).
The most commonly used variable argument is default. Terraform will infer the variable type from the default value. If you do not have a default then it will default to string so if you want a list or map then you have to specify the type argument.
The description argument is optional but recommended, particularly when you are creating reusable modules in the later labs.
We could have added these lines to the top of our main.tf file, but it makes sense to have them in separate files. It is the variables that commonly change between deployments, so moving them may allow the other *.tf files to be re-used without change. Also we can use different file permissions for the variables file if required.
Using strings
Let’s edit our existing main.tf file and make use of the variables. The interpolation format for simple string variables is "${var.<varname>}". The instructions will intentionally become less explicit to force you to refer to the documentation
- Change the resource group’s name to use
"${var.rg}" - Change the resource group’s location to make use of the new
locvariable - Change the value for the location argument in the storage account stanza
- We’ll link it to the location attribute exported from the resource group stanza
- Format:
"${azurerm_resource_group.<terraformId>.location}" - The Terraform docs for each provider type show the exported attributes, although some standard ones such as id, location and tags aren’t always listed
- Save your files locally
- Run a
terraform plan
We may have introduced some simple string variables, but the plan output should indicate that there is nothing there that requires a change as our variable values match those in the state. (More on how Terraform handles state in later labs.)
Using lists
Lists are simple arrays. We won’t use them just yet, but now is the right time to cover them quickly. Here is an example declaration of a simple array:
variable "webAppLocations" {
    default = [ "francecentral", "canadaeast", "brazilsouth", "japanwest" ]
}
Terraform will interpolate "${var.webAppLocations[2]}" as brazilsouthas the list index starts at zero.
Question:
What would be the interpolation syntax to return the number of Web App locations in the array? (Find the interpolation page in the Terraform Docs area for an example.)
Answer:
"${length(var.webapplocs)}"
That’s our first function. It won’t be our last.
We will use use lists actively in the next lab when defining multiple subnets in our virtual network. Let’s move on to maps.
Using maps
There is a ‘tags’ variable in the variables.tf file that is defined as a map.
variable "tags" {
    type = "map"
    default = {
        environment = "training"
        source      = "citadel"
    }
}
We can pull out individual values. For instance "${var.tags["source"]}" would be evaluated as citadel. (Note the syntax always uses double speech marks " rather than single quotes '.)
Wwe can also pass in the whole map using "${var.tags}", which will be resolved to:
{
    environment = "training"
    source      = "citadel"
}
Let’s use that tags map for our resources:
- Change the tags for the resource group to use the whole map for the tags variable
- Set the tags on the storage account to use the tags exported attribute of the azurerm_resource_group
- Prefix the storage account name with the value of the source tag
- Rerun the
terraform plan
If you get stuck on this section then you can skip to the end of the lab and click on the terraform-lab2 repo to show example files.
You should notice that the plan now shows some changes to be applied:
richard@Azure:~/terraform-labs$ terraform plan
Refreshing Terraform state in-memory prior to plan...
The refreshed state will be used to calculate this plan, but will not be
persisted to local or remote state storage.
azurerm_resource_group.lab2: Refreshing state... (ID: /subscriptions/2d31be49-d959-4415-bb65-...2c90ba62/resourceGroups/terraform-lab2)
azurerm_storage_account.lab2sa: Refreshing state... (ID: /subscriptions/2d31be49-d959-4415-bb65-.../storageAccounts/richeneyterraformlab2)
------------------------------------------------------------------------
An execution plan has been generated and is shown below.
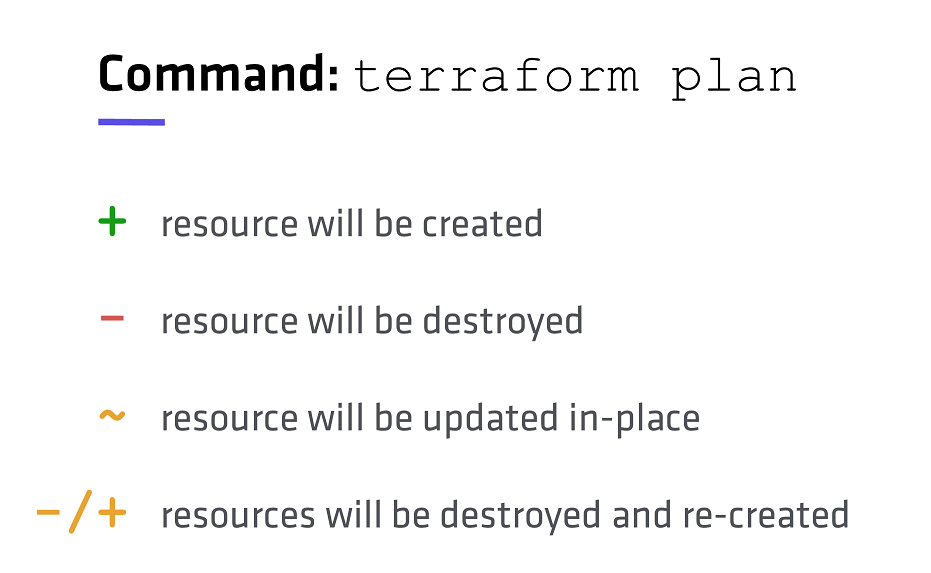
Resource actions are indicated with the following symbols:
~ update in-place
-/+ destroy and then create replacement
Terraform will perform the following actions:
~ azurerm_resource_group.lab2
tags.%: "1" => "2"
tags.source: "" => "citadel"
-/+ azurerm_storage_account.lab2sa (new resource required)
id: "/subscriptions/2d31be49-d959-4415-bb65-8aec2c90ba62/resourceGroups/terraform-lab2/providers/Microsoft.Storage/storageAccounts/richeneyterraformlab2" => <computed> (forces new resource)
access_tier: "" => <computed>
account_encryption_source: "Microsoft.Storage" => "Microsoft.Storage"
account_kind: "Storage" => "Storage"
account_replication_type: "LRS" => "LRS"
account_tier: "Standard" => "Standard"
enable_blob_encryption: "true" => "true"
enable_file_encryption: "true" => "true"
identity.#: "0" => <computed>
location: "westeurope" => "westeurope"
name: "richeneyterraformlab2" => "citadelricheneytflab2" (forces new resource)
primary_access_key: <sensitive> => <computed> (attribute changed)
primary_blob_connection_string: <sensitive> => <computed> (attribute changed)
primary_blob_endpoint: "https://richeneyterraformlab2.blob.core.windows.net/" => <computed>
primary_connection_string: <sensitive> => <computed> (attribute changed)
primary_file_endpoint: "https://richeneyterraformlab2.file.core.windows.net/" => <computed>
primary_location: "westeurope" => <computed>
primary_queue_endpoint: "https://richeneyterraformlab2.queue.core.windows.net/" => <computed>
primary_table_endpoint: "https://richeneyterraformlab2.table.core.windows.net/" => <computed>
resource_group_name: "terraform-lab2" => "terraform-lab2"
secondary_access_key: <sensitive> => <computed> (attribute changed)
secondary_blob_connection_string: <sensitive> => <computed> (attribute changed)
secondary_blob_endpoint: "" => <computed>
secondary_connection_string: <sensitive> => <computed> (attribute changed)
secondary_location: "" => <computed>
secondary_queue_endpoint: "" => <computed>
secondary_table_endpoint: "" => <computed>
tags.%: "0" => "2"
tags.environment: "" => "training"
tags.source: "" => "citadel"
Plan: 1 to add, 1 to change, 1 to destroy.
------------------------------------------------------------------------
Note: You didn't specify an "-out" parameter to save this plan, so Terraform
can't guarantee that exactly these actions will be performed if
"terraform apply" is subsequently run.
This is when the plan stage becomes very useful, to see the impact of a change or addition. The colours on your screen are a useful indicator:
- Additions to the environment are shown in green
- In place changes are shown in orange (such as the resource group tag change)
- Deletes and disruptive changes are shown in red (such as the storage account name change)
Note that renaming a resource group or renaming a resource will require a more disruptive re-creation as the cosmetic names form part of the Azure resourceId. There are other changes that cannot be handled by the Azure Resource Manager layer as a straight update and require a deletion and recreation.
The plan stage removes the guess work in managing a system through infrastructure as code, not only showing you what will happen, and the order and dependencies of those changes, but also the reasons for certain actions such a re-create.
In the Cloud Shell, type terraform --help plan. You will see a --out switch, that can be used to create a file of the plan. This may be used as a record of the change for change management systems, and may also be an input for the terraform apply stage. The terraform apply will run the plan first by default, except when you specify a serialised plan file.
There is no capability to revert to a previous configuratiom directly within Terraform itself. Instead you need to leverage source code management (SCM) systems to roll back to a previous set of configuration files and then run the plan and apply stages. (In the next lab we will make use of a personal GitHub repository.)
OK, let’s apply that change:
- Run
terraform apply
Additional Terraform providers
First of all, as you know, Terraform supports multiple providers, from public and private cloud providers, through configuration management software such as Chef, application providers such as RabbitMQ and Kubernetes, a number of public DNS providers (e.g. Cloudflare) and monitoring software such as Datadog. It also has a number of miscellanous providers to extend the core functionality, such as those interacting with file and zips using the local, archive and template resource types.
Defining unique names using random_string
The storage account names need to be unique as it forms part of the external FQDN of the public endpoint. The shortname needs to be 3-24 characters of lowercase alphanumerics. We’ll reconfigure the storage account name to use a eight character random string suffix. This will introduces a couple of key concepts.
Again, you will need to be more self sufficient in this section. (If you do get stuck then you can always check the example repo at the end of the lab.)
- Read the Terraform provider page for random
- What are the arguments?
- What is the exported attribute?
- Add in a new resource stanza
- Use random_string as the provider type
- Specify the id as “rnd”
- Set the length to 8
- Set the boolean values appropriately for the storage account naming restrictions
- Configure the storage account name to concatenate the following
- Begin with ‘sa’
- Concatenate the value of the source tag (e.g. ‘citadel’)
- Suffix with the random string
Save the file and then run terraform plan to see the impact.
The command should show that you haven’t got all of the required providers:
richard@Azure:~/terraform-labs$ terraform plan
Plugin reinitialization required. Please run "terraform init".
Reason: Could not satisfy plugin requirements.

Plugins are external binaries that Terraform uses to access and manipulate
resources. The configuration provided requires plugins which can't be located,
don't satisfy the version constraints, or are otherwise incompatible.

1 error(s) occurred:

* provider.random: no suitable version installed
  version requirements: "(any version)"
  versions installed: none

Terraform automatically discovers provider requirements from your
configuration, including providers used in child modules. To see the
requirements and constraints from each module, run "terraform providers".


Error: error satisfying plugin requirements
Run the terraform init command to pull down the random provider, and then run through the terraform plan and terraform apply steps.
Question:
As you build up Terraform configurations you will need to read the resource pages for the providers to find out which exported attributes you can then use elsewhere in your .tf files.
What are the four exported attributes for random_id? (Not random_string.)
Answer:
The random_id provider type exports b64_url, b64_std, hex and dec.
Question:
If you wanted to ensure that the storage account name never exceeded 24 characters then which interpolation function could you use?
Answer:
substr(string, offset, length), e.g. "${substr("sa${var.tags["source"]}${random_string.rnd.result}", 0, 24)}". The original string must be longer than the sum of offset and length so consider a longer random_string.
Using terraform console
You may use terraform console to query the values of graph database entities in the state. The console command creates a REPL, or Read-Evaluate-Print-Loop.
Enter in the values of Below is an example:
richard@Azure:~/terraform-labs$ terraform console
> var.rg
terraform-lab2
> var.tags
{
  "environment" = "training"
  "source" = "citadel"
}
> random_string.rnd.result
xafyl2l6
> azurerm_resource_group.lab2.id
/subscriptions/2d31be49-d959-4415-bb65-8aec2c90ba62/resourceGroups/terraform-lab2
> azurerm_storage_account.lab2sa.name
sacitadelxafyl2l6
> azurerm_storage_account.lab2sa.account_tier
Standard
> exit
Releasing state lock. This may take a few moments...
End of Lab 2
We have reached the end of the lab. You have started to use variables and functions. Your .tf files should look similar to those in https://github.com/richeney/terraform-pre-012-lab2.
From lab 3 onwards we will be using Visual Studio Code and locally stored files rather than Cloud Shell. Therefore you can delete everything we’ve created to date. Run a terraform destroy to remove the environment. Feel free to keep the terraform-labs directory in your Cloud Shell home directory, but if you do want to clean it up then run rm -fR ~/terraform-labs.
In the next lab we will start to create the core of a more substantial Azure environment and base it in GitHub.
Leave a comment